
Prise en charge intégrale
Dépannage et réparation HP DesignJet T2600
à Lyon et en Rhône-Alpes
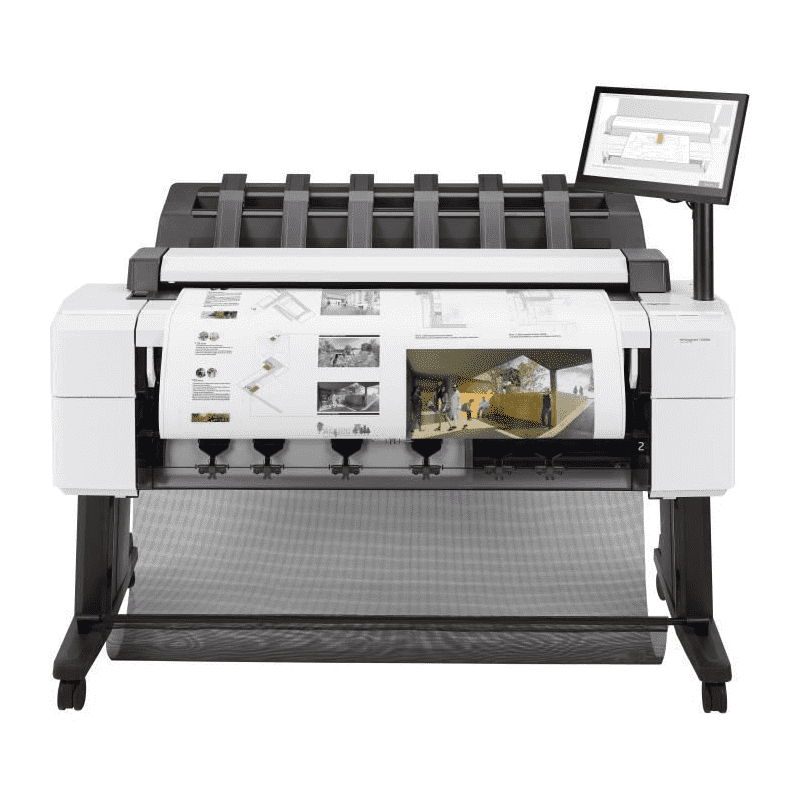
Spécialistes HP DesignJet depuis 1994.
Nous prenons en charge votre HP DesignJet T2600 de A à Z.
30 années d'expertise
Spécialiste HP DesignJet depuis 1994
Un technicien, pas un standard
Vous parlez directement à un expert
Devis en 2 heures
Intervention sur site en 48 h
Rhône-Alpes
Lyon, Grenoble, Annecy, Chambéry…
VOTRE TRACEUR T2600 EST EN PANNE ?
Dépannage et réparation du HP DesignJet T2600 sur site
Basés à Lyon, nous sommes idéalement situés pour dépanner et réparer votre HP DesignJet T2600 dans toute la région Rhône-Alpes.
Avec plus de 30 années d'expérience, nous dépannons et réparons tous les modèles HP DesignJet, des versions les plus anciennes aux dernières générations.
Chez nous, les modèles que d'autres services déclarent obsolètes ou irréparables restent réparables encore longtemps. Et si la réparation échoue, l'intervention ne vous est pas facturée.
Ce que comprend notre intervention sur votre HP DesignJet T2600
- Diagnostic gratuit par téléphone
- Devis de dépannage précis en 2 heures
- Dépannage en Rhône-Alpes en 48 heures
- Réparation de toutes les pannes
- Tarifs raisonnables et transparents
- Toutes les pièces détachées en stock
- Toutes nos interventions garanties 1 an sur site
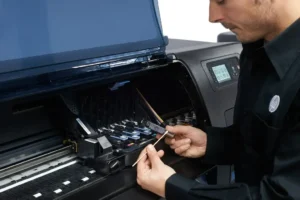
Chaque dépannage réalisé sur votre HP DesignJet T2600 est couvert par une garantie 1 an sur site : si la panne réparée se reproduit dans l'année, nous revenons chez vous sans frais, pièce et main-d'œuvre comprises.
Remplacement de la courroie + révision complète : À partir de 360 € HT
Votre traceur HP DesignJet T2600 affiche un code erreur 86:01 ou la courroie est déchirée ?
Notre technicien intervient sur site pour remplacer la courroie dans les règles de l'art. Le remplacement inclut le nettoyage interne complet du traceur — pas question de poser une courroie neuve dans un appareil encrassé.
Une fois la courroie remplacée, notre technicien teste la qualité d'impression, nettoie les têtes d'impression et optimise les réglages. Au départ du technicien, votre HP DesignJet T2600 aura droit à une seconde jeunesse.
Avant d'engager une réparation lourde, il vaut la peine de se demander si elle en vaut encore la peine : notre page réparer ou remplacer son traceur donne les cinq critères que nous passons en revue au téléphone. Et si le remplacement s'impose, nous rachetons votre HP DesignJet T2600, en état de marche ou non.
VOUS AVEZ BESOIN DE CARTOUCHES D'ENCRE ?
Nous avons en stock toutes les cartouches pour HP DesignJet T2600
- Stock important et permanent
- Livraison en 24h à Lyon — 48h France entière
- Cartouches originales HP uniquement
- Têtes d'impression également disponibles
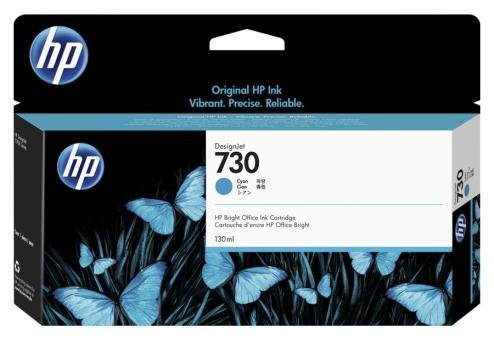
P2V62A HP 730
76 €HT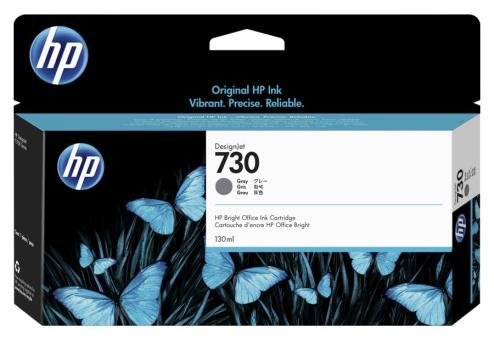
P2V66A HP 730
76 €HT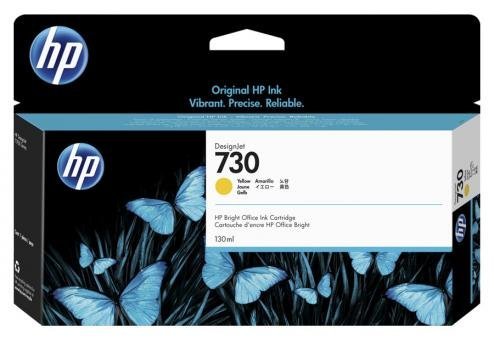
P2V64A HP 730
76 €HT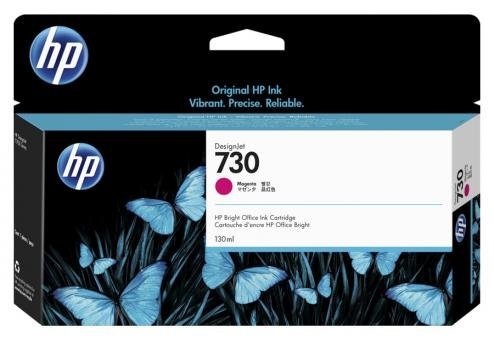
P2V63A HP 730
76 €HT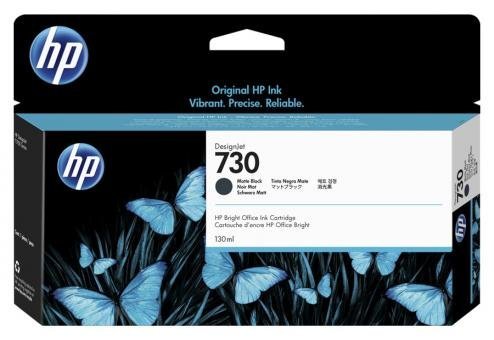
P2V65A HP 730
76 €HT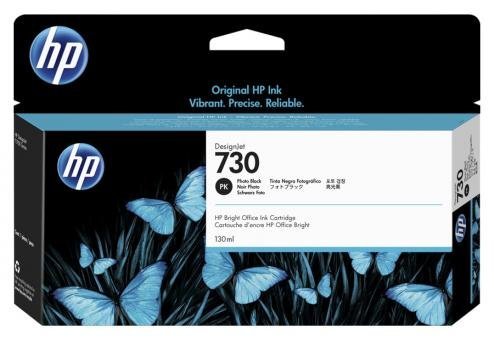
P2V67A HP 730
76 €HT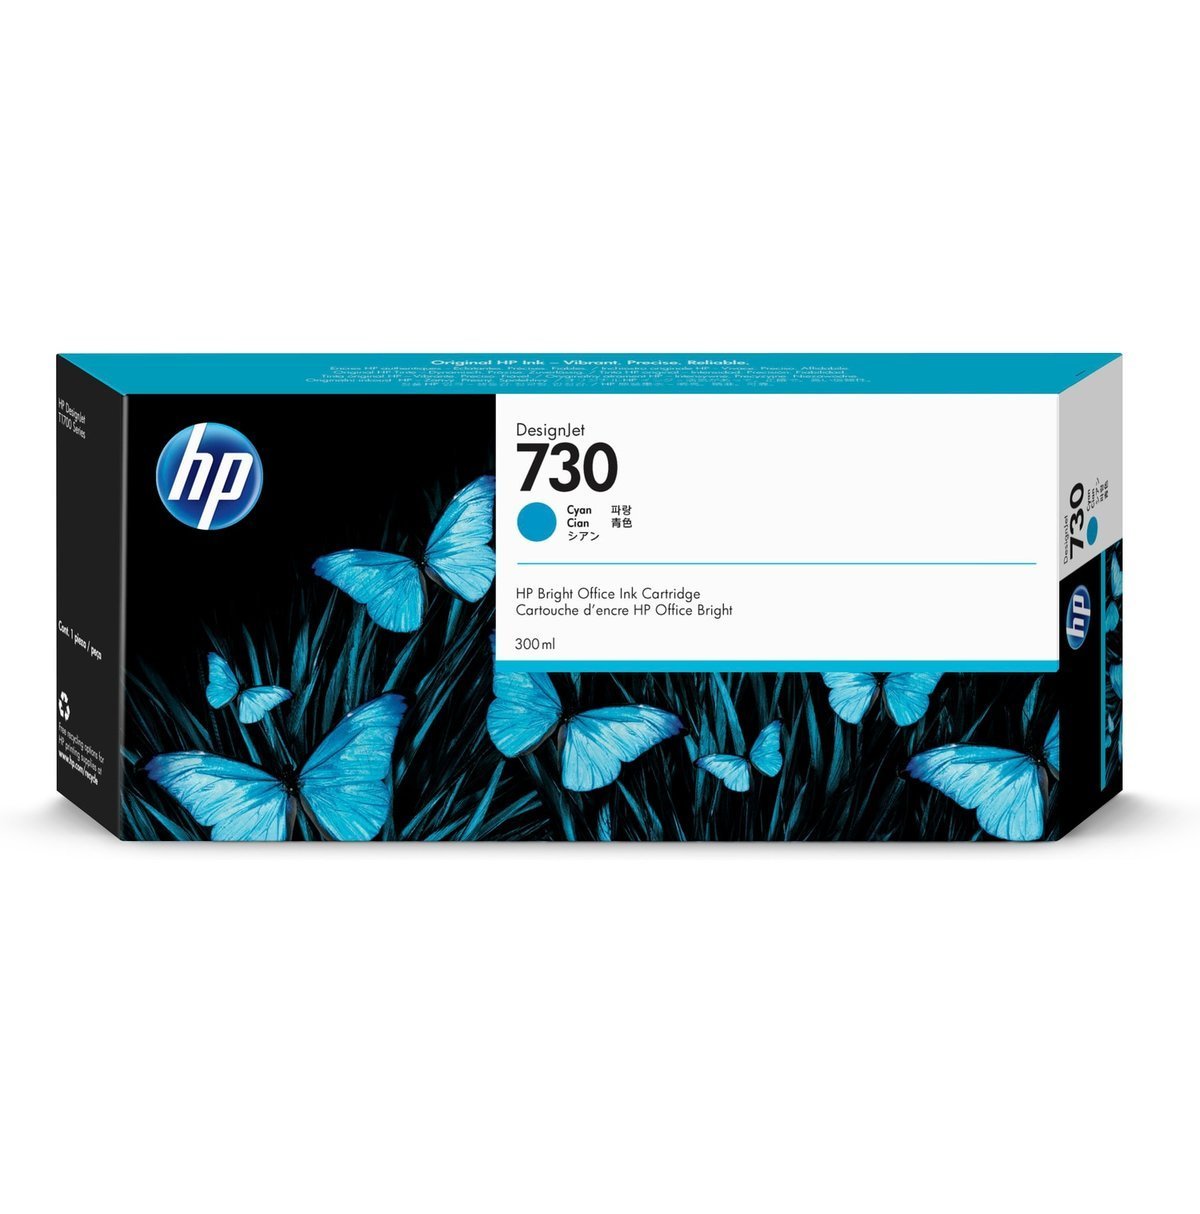
P2V68A HP 730
145 €HT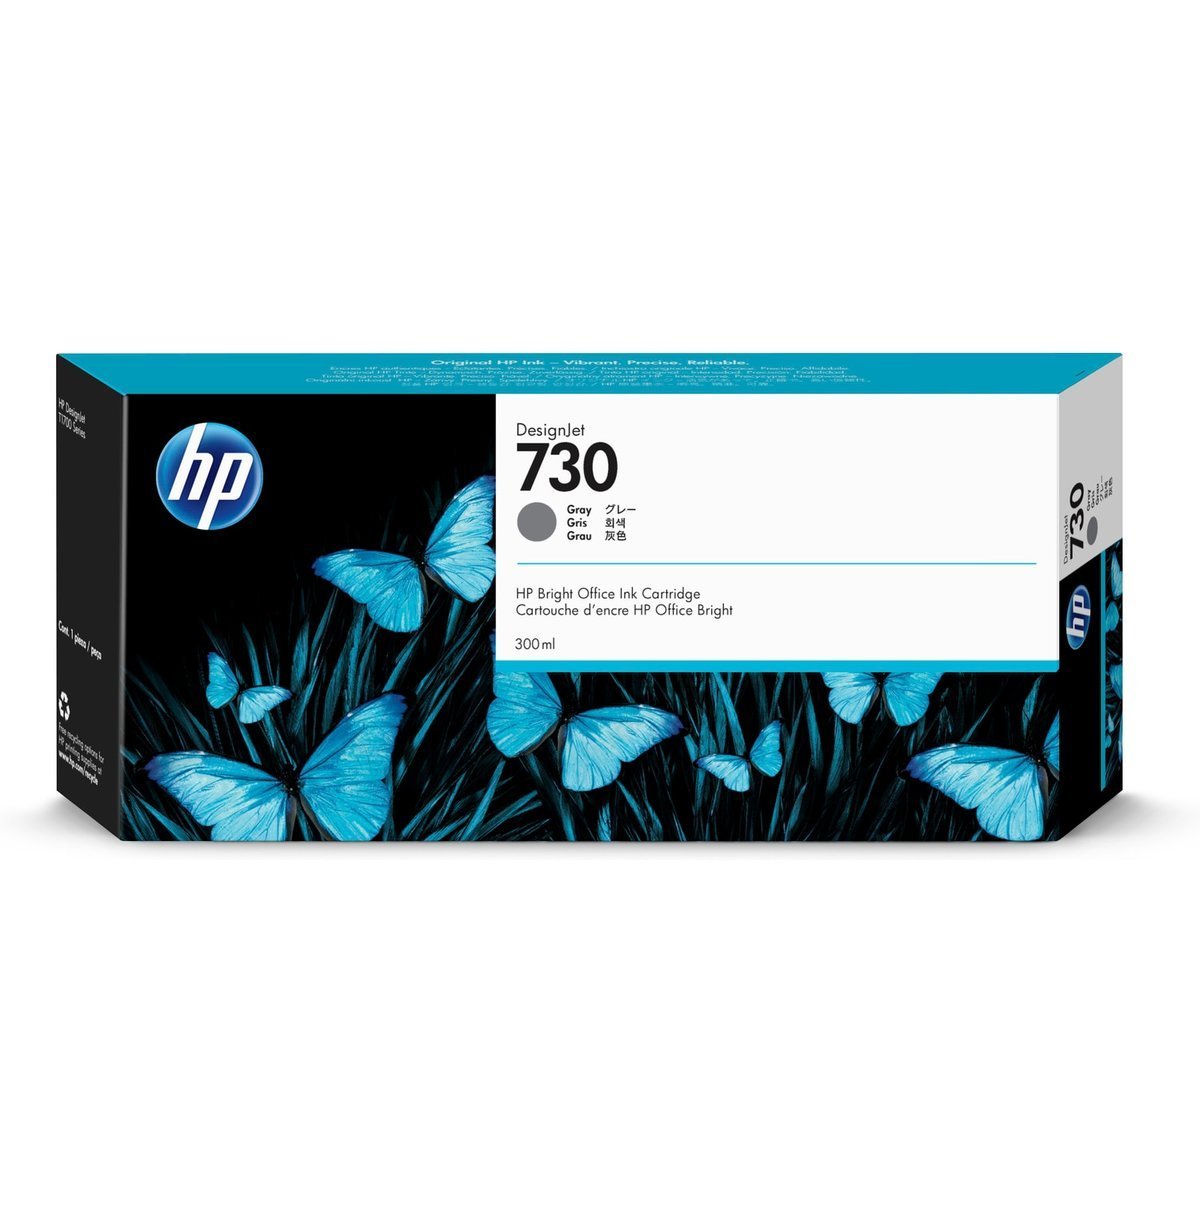
P2V72A HP 730
145 €HT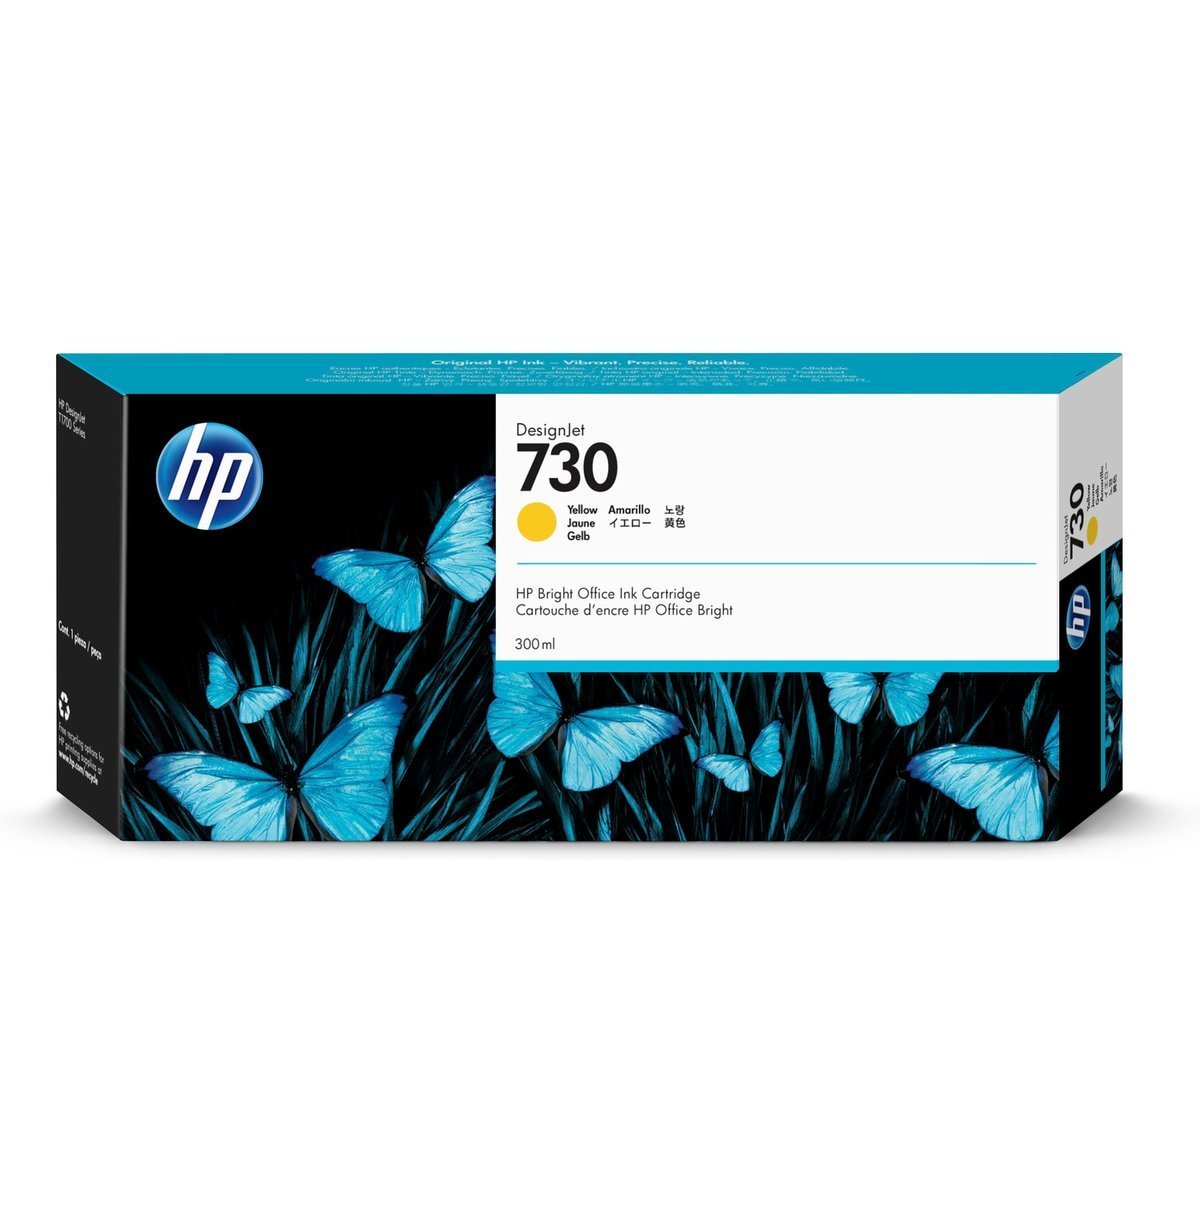
P2V70A HP 730
145 €HT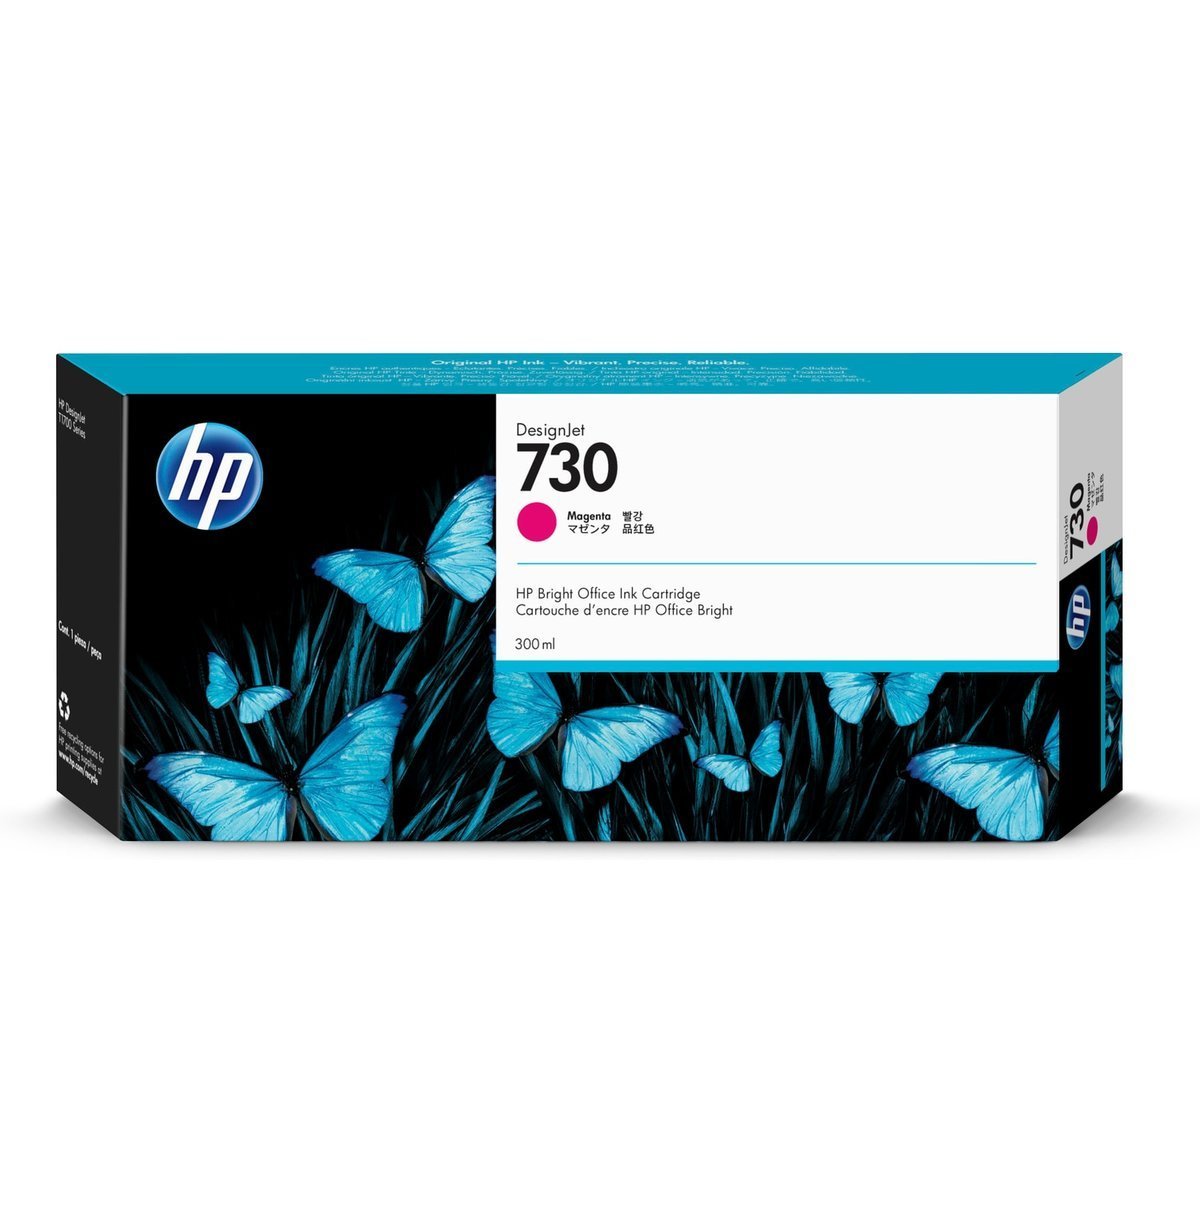
P2V69A HP 730
145 €HT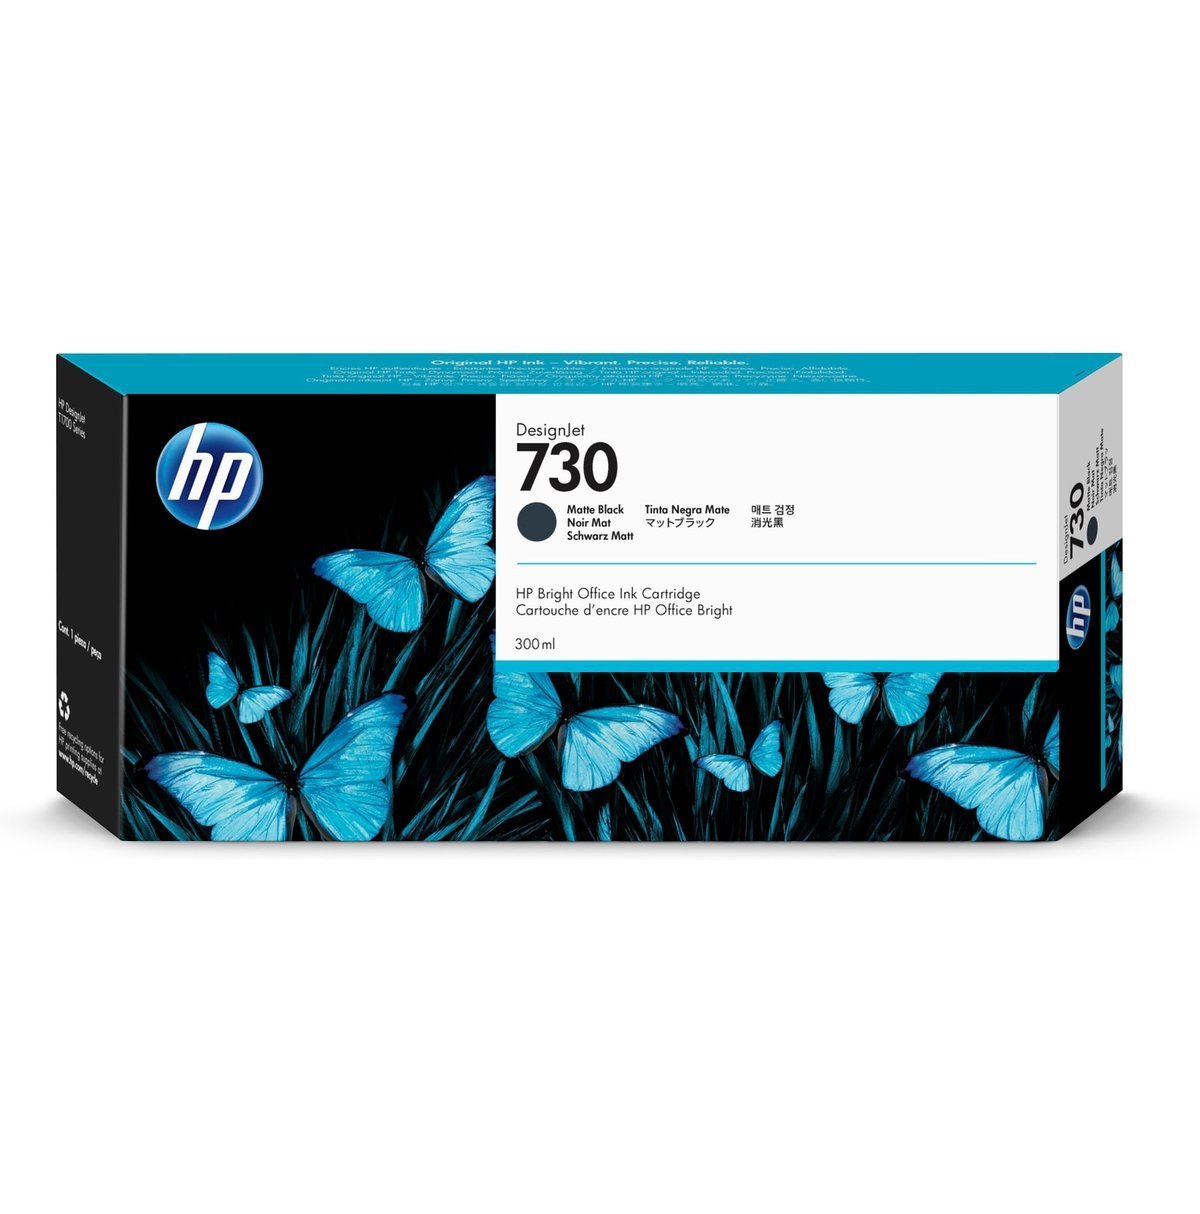
P2V71A HP 730
145 €HT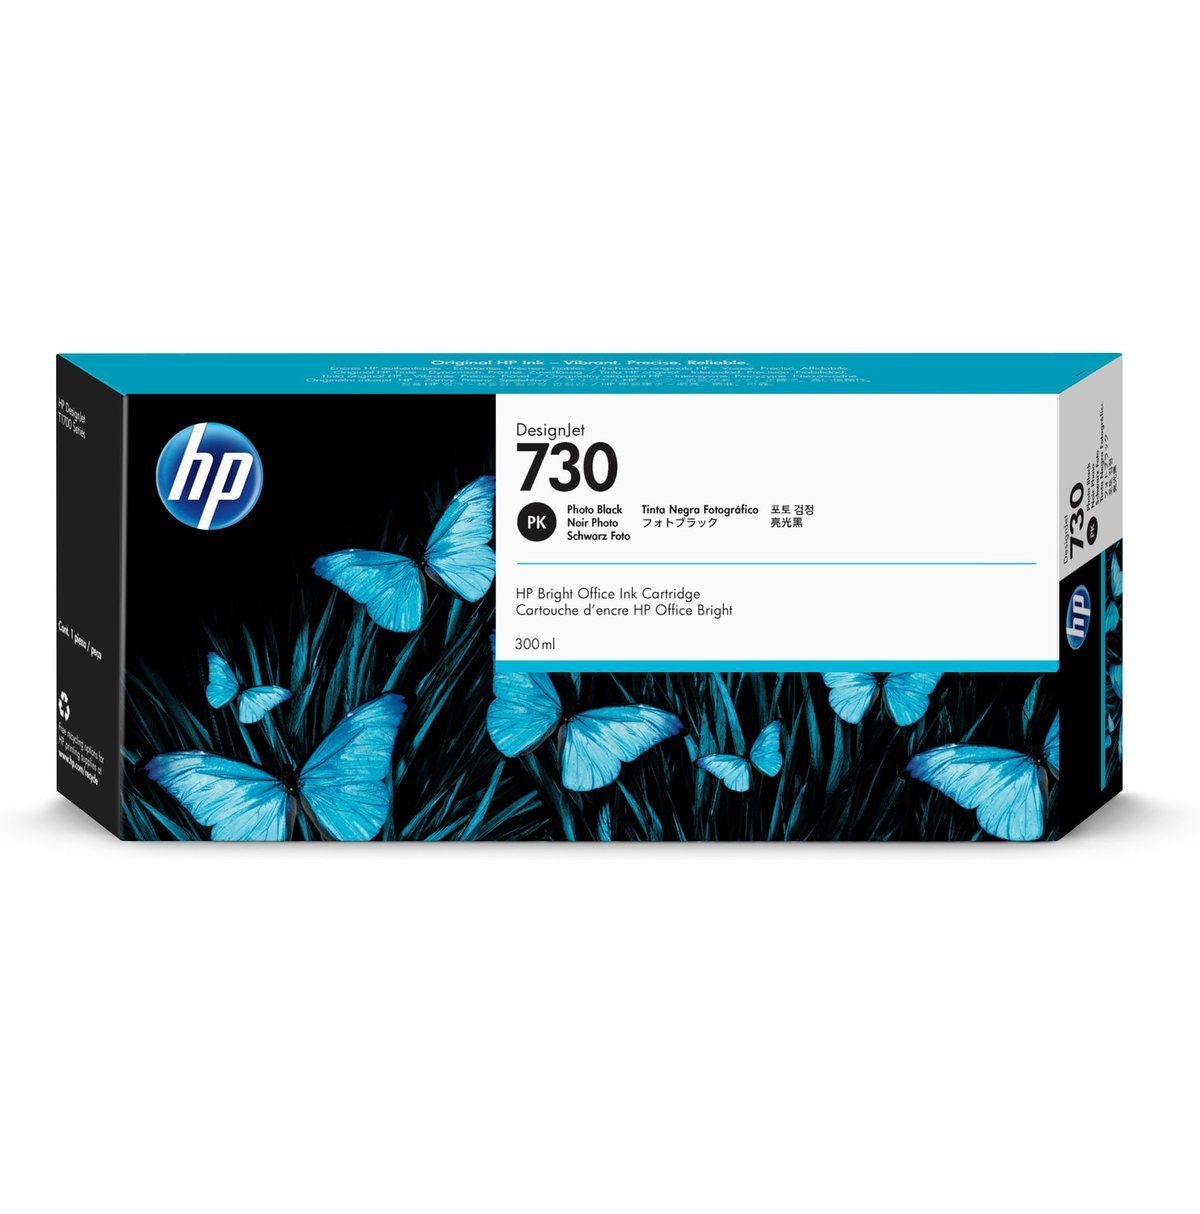
P2V73A HP 730
145 €HTFaites défiler dans le cadre pour voir toutes les cartouches correspondant à votre modèle.
Prolongez la vie de votre traceur
Contrat de maintenance
Pour HP DesignJet T2600
Inclus dans les trois formules
- Nettoyage interne, graissage…
- Contrôle courroie, service station...
- Mise à jour firmware, réglages
- Tests d'impression, amélioration qualité
- Assistance téléphonique illimitée
- Télémaintenance avec TeamViewer
- Priorité sur les dépannages - garantis en 48h
En plus avec Privilège et Premium
- Main-d'œuvre illimitée incluse
- Déplacements illimités inclus
En plus avec Premium uniquement
- Pièces détachées incluses
- Carte mère incluse
- Remplacement préventif des pièces d'usure

RESSOURCES TECHNIQUES
Tout ce dont vous avez besoin sur le HP DesignJet T2600
Toutes nos ressources et nos 30 années d'expérience à votre disposition.
Pilotes d'impression, utilitaire d'impression PDF, codes erreur, pannes fréquentes, nomenclature des pièces détachées
Tous les codes erreur
Traduction française par IA — en cas de doute sur une procédure, vérifiez le texte anglais d'origine (bouton EN).
Aucun résultat — contactez-nous
-
0001-0001-0003
+The firmware has detected an unsupported Engine PCA version.
Solution :
1. Make sure that the printer has the latest firmwareversion. 2. Upgrade the firmware version. See Appendix A: Updating firmware in boot mode on page 292. 3. Run the 00102 Check Mechatronics service diagnostic and check if the Engine PCA version is the proper one. 4. Replace the Engine PCA if needed.
-
0001-0001-0004
+The Engine PCA cannot communicate with the Formatter PCA. If the issue is persistent, it indicates a malfunction in the Engine PCA.
Solution :
1. Check that the communication cable from the Formatter PCA to the Engine PCA is unbroken, undamaged and properly connected. 2. Run the 00102 Check Mechatronics service diagnostic and check if the Engine PCA communication status is OK. 3. Replace the Engine PCA, if needed. 4. Replace the Formatter PCA, if needed.
-
0001-0001-0010
+The firmwarehas detected an internal voltage in the Engine PCA outside of normal range. If the issue is persistent, it indicates a malfunction in the Engine PCA.
Solution :
1. Run the 00102 Check Mechatronics service diagnostic and check if the input voltage from the Engine PCA is within its operation range. 2. Replace the Engine PCA if needed.
-
0001-0001-0052
+The printer has detected that the power cable from the Engine PCA is not properly connected to the DC/DC Power Supply PCA.
Solution :
1. Check that the power cable from DC/DC Power supply PCA to Engine PCA and its corresponding connector are not broken, not dirty and undamaged. 2. Run the 00102 Check Mainboard electronics service diagnostic and check if the Engine PCA communication status is OK. 3. Replace the Engine PCA, if needed.
-
0001-0001-0053
+The printer has detected that the Engine PCA is not properly connected to the Formatter PCA (PCI express).
Solution :
1. Check that the Engine PCA is properly connected to the Formatter PCA.2. Clean the gold contacts from the engine PCA PCI connector. 3. Run the 00102 Check Mainboard electronics service diagnostic and check if the Engine PCA communication status is OK. 4. Replace the Engine PCA, if needed. 5. Replace the Formatter PCA, if needed.
-
0001-0001-0095
+32V voltage out of spectification in Engine PCA.
Solution :
1. Check if the power cable from the DC/DC power supply PCA to the Engine PCA and its corresponding connector is unbroken, undamaged and properly connected. 2. Check that the trailing cable is well connected on the Engine PCA. 3. Run the 00102 Check Mechatronics service diagnostic and check if the 32V voltage from the Engine PCA is in range. 4. Replace the Engine PCA, if needed. 5. Replace the DC/DC power supply PCA, if needed.
-
0001-0002-0003
+The .irmware has detected an unsupported Engine PCA version.
Solution :
1. Make sure that the printer has the latest .irmware version. 2. Upgrade the .irmware version. 3. Run the 00102 Check Mechatronics service diagnostic and check if the Engine PCA version is the proper one. 4. Replace the Engine PCA, if needed.
-
0001-0002-0004
+The Engine PCA cannot communicate with the Formatter PCA. If the issue is persistent, it indicates a malfunction in the Engine PCA.
Solution :
1. Check that the communication cable from the Formatter PCA to the Engine PCA is unbroken, undamaged and properly connected. 2. Run the 00102 Check Mechatronics service diagnostic and check if the Engine PCA communication status is OK. 3. Replace the Engine PCA, if needed. 4. Replace the Formatter PCA if needed.
-
0001-0002-0010
+The .irmware has detected an internal voltage in the Engine PCA outside of normal range. If the issue is persistent, it indicates a malfunction in the Engine PCA.
Solution :
1. Run the 00102 Check Mechatronics service diagnostic and check if the input voltage from the Engine PCA is within its operation range. 2. Replace the Engine PCA, if needed.
-
0001-0002-0052
+The printer has detected that the power cable from the Engine PCA is not properly connected to the DC/DC Power Supply PCA.
Solution :
1. Check that the power cable from DC/DC Power supply PCA to Engine PCA and its corresponding connector are not broken, not dirty and undamaged. 2. Run the 00102 Check Mainboard electronics service diagnostic and check if the Engine PCA communication status is OK. 3. Replace the Engine PCA, if needed.
-
0001-0002-0053
+The printer has detected that the Engine PCA is not properly connected to the Formatter PCA (PCI express).
Solution :
1. Check that the Engine PCA is properly connected to the Formatter PCA. 2. Clean the gold contacts on the engine PCA PCI connector. 3. Run the 00102 Check Mainboard electronics service diagnostic and check if the Engine PCA communication status is OK. 4. Replace the Engine PCA, if needed. 5. Replace the Formatter PCA, if needed.
-
0001-0002-0095
+32V voltage out of specti.cation in the Engine PCA.
Solution :
1. Check if the power cable from the DC/DC power supply PCA to the Engine PCA and its corresponding connector are unbroken, undamaged and properly connected. 2. Run the 00102 Check Mechatronics service diagnostic and check if the 32V voltage from the Engine PCA is in range. 3. Replace the DC/DC power supply PCA, if needed. 4. Replace the Engine PCA, if needed.
-
0001-0006-0002
+The printer has not been able to detect the RFID PCA presence.
Solution :
1. Run the 00104 Check RFID electronics service diagnostic and check the RFID PCA status. 2. Check that the RFID cable to the Engine PCA is unbroken, undamaged and properly connected. 3. If the error persists, get the diagnostic package
-
0001-0006-0048
+The printer is not able to receive the expected data that has been sent from the RFID PCA.
Solution :
1. Run the 00104 Check RFID electronics service diagnostic and check the RFID PCA status. 2. Check that the RFID cable to the Engine PCA is unbroken, undamaged and properly connected. 3. If the error persists, get the diagnostic package
-
0001-0008-0002
+The printer has detected that the power cable from the Engine PCA is not properly connected to the DC/DC Power supply PCA.
Solution :
1. Check that the cable from the DC/DC Power supply PCA to Power Supply Unit and its corresponding connector are not broken, not dirty and undamaged. 2. Run the 00101 Check one rail service diagnostic and check if the DC/DC Power supply PCA communication status is OK. 3. Replace the Power Supply Unit, if needed. 4. Replace the DC/DC Power supply PCA, if needed.
-
0001-0008-0009
+The printer has detected that the data cable from the DC/DC Power Supply is not properly connected to the Engine PCA.
Solution :
1. Check that the cable from the DC/DC Power supply PCA to Engine PCA and its corresponding connector are not broken, not dirty and undamaged. 2. Run the 00101 Check one rail service diagnostic and check if the DC/DC Power supply PCA communication status is OK. 3. Replace the DC/DC Power supply PCA, if needed. 4. Replace the Engine PCA, if needed.
-
0001-0008-0011
+32V voltage out of specification, overvoltage.
Solution :
1. Run the 00101 Check one rail service diagnostic and check if the 32V signal is in range. 2. Replace the DC/DC power supply PCA, if needed.
-
0001-0008-0012
+32 V voltage out of specification, undervoltage in DC/DC Power Supply PCA.
Solution :
1. Run the 00101 Check one rail service diagnostic and check if the 32 V signal is in range. 2. Replace the DC/DC Power supply PCA, if needed.
-
0001-0008-0015
+The printer has detected that the electrical protection from the DC/DC Power Supply is not properly working.
Solution :
1. Run the 00101 Check one rail service diagnostic and check if the DC/DC Power supply PCA communication status is OK. 2. Replace the DC/DC Power supply PCA, if needed.
-
0001-0008-0054
+Voltage out of specification, overvoltage or undervoltage in DC/DC power supply PCA.
Solution :
1. Run the 00101 Check one rail service diagnostic and check if the 32V signal is in range. 2. Replace the DC/DC power supply PCA, if needed.
-
0001-0009-0080
+The E-box fan is malfunctioning.
Solution :
1. Check that the cable from the fan to the Engine PCA is unbroken, undamaged and properly connected. 2. Make sure that the E-box fan is not blocked or dirty. 3. Run the 00102 Check Mechatronics service diagnostic and check the fan status. 4. Replace the E-box fan, if needed
-
0003-0009-0009
+The printer has detected that the cable from the Power Supply is not properly connected to Formatter PCA.
Solution :
1. Check that the cable between PSU to Formatter PCA is unbroken, undamaged and properly connected. 2. Run the 00301 Check Power Supply Fan service diagnostic and check the fan status. 3. Replace the Power Supply Unit, if needed.
-
0003-0009-0080
+The PSU fan is malfunctioning.
Solution :
1. Check that the cable between PSU to Formatter PCA is unbroken, undamaged and properly connected. 2. Make sure that the PSU fan is not blocked or dirty. 3. Run the 00301 Check Power Supply Fan service diagnostic and check the fan status. 4. Replace the Power Supply Unit, if needed.
-
0021-0001-0001
+Drop Detector not working as expected or cannot be detected.
Solution :
1. Check that the cables between the Drop detector to Service station PCA are properly connected, not broken, not dirty and undamaged. 2. Run the 02101 Check Electronics service diagnostic test and check if the Drop Detector functionality status is OK. 3. Replace the Drop Detector. 4. If the problem persists, replace the Service station PCA.
-
0021-0001-0010
+The firmware has detected an internal voltage in Drop detector outside of normal range. If the issue is persistent it indicates a malfunction in Drop Detector.
Solution :
1. Run the 02101 Check Electronics service diagnostic test and check if the Drop Detector functionality status is OK. 2. Replace the Drop Detector. 3. If the problem persists, replace the Service station PCA.
-
0021-0001-0080
+The Drop detector sensor has detected particles, such as fibers, hair or paper pieces, blocking the sensor as they can affect print-quality.
Solution :
1. Check the printhead health. 2. Make sure that the Drop detector is clear. 3. Check if the encoder strip is dirty. Clean it, if possible. 4. Check that the Drop detector is undamaged and properly connected to Service station PCA. 5. Run the 02101 Check Electronics service diagnostic test and check if the Drop Detector functionality status is OK. 6. Replace the Drop detector if needed. 7. If the problem persists, replace the Service Station PCA.
-
0021-0002-0001
+There is an issue with Service Station motor that does not assure its functionality.
Solution :
1. Check that the cables between the Service Station to Engine PCA are unbroken, undamaged and properly connected. In case of any damage, replace the cables. 2. Run the 02101 Check Electronics or the 02102 Check service Station motor service diagnostic tests to troubleshoot the problem further. 3. Replace the Service station.
-
0021-0002-0017
+There is an electrical or mechanical issue with Service Station motor that does not assure the motor move correctly.
Solution :
1. Check that the cables between the Service Station to Engine PCA are unbroken, undamaged and properly connected. In case of any damage, replace the cables. 2. Run the 02101 Check Electronics or the 02102 Check service Station motor service diagnostic tests to troubleshoot the problem further. 3. Replace the Service station
-
0021-0002-0065
+There is a movement issue with the Service Station motor that does not assure its functionality.
Solution :
1. Check that the cables between the Service Station and the Engine PCA are unbroken, undamaged and properly connected. In case of any damage, replace the cables. 2. Perform the service station diagnostic test 02101 Check Electronicsor 02102 Check service Station motor to troubleshoot the problem further. 3. Replace the service station.
-
0021-0003-0161
+There is an electrical fault in Primer valve Y .
Solution :
1. Check that the valve and connectors are properly connected, not broken, not dirty and undamaged. 2. Run the 02103 Check Primer motor service diagnostic and check if the Primer valve status is OK. 3. Replace the Primer valve. 4. If the problem persists, replace the Engine PCA.
-
0021-0003-0162
+The Primer valve Y driver located in the Engine PCA has detected an over-temperature and it stops. NOTE: A motor driver can control more than one motor, so any of these motors can report this error if they operate at the same time.
Solution :
1. Check that the valve and connectors are properly connected, not broken, not dirty and undamaged. 2. Run the 02103 Check Primer motor service diagnostic and check if the primer valve status is OK. 3. Replace the Primer valve. 4. If the problem persists, replace the Engine PCA.
-
0021-0003-0163
+Motor driver not working as expected while Primer valve Y is working.
Solution :
1. Check that the valve and connectors are properly connected, not broken, not dirty and undamaged. 2. Run the 02103 Check Primer motor service diagnostic and check if the Primer valve status is OK. 3. Replace the Primer valve. 4. If the problem persists, replace the Engine PCA.
-
0021-0003-0261
+There is an electrical fault in Primer valve Y .
Solution :
1. Check that the valve and connectors are properly connected, not broken, not dirty and undamaged. 2. Run the 02103 Check Primer motor service diagnostic and check if the Primer valve status is OK. 3. Replace the Primer valve. 4. If the problem persists, replace the Engine PCA.
-
0021-0003-0262
+The Primer valve Y driver located in the Engine PCA has detected an over-temperature and it stops. NOTE: A motor driver can control more than one motor, so any of these motors can report this error if they operate at the same time.
Solution :
1. Check that the valve and connectors are properly connected, not broken, not dirty and undamaged. 2. Run the 02103 Check Primer motor service diagnostic and check if the primer valve status is OK. 3. Replace the Primer valve. 4. If the problem persists, replace the Engine PCA.
-
0021-0003-0263
+Motor driver not working as expected while Primer valve Y is working.
Solution :
1. Check that the valve and connectors are properly connected, not broken, not dirty and undamaged. 2. Run the 02103 Check Primer motor service diagnostic and check if the Primer valve status is OK. 3. Replace the Primer valve. 4. If the problem persists, replace the Engine PCA.
-
0021-0004-0161
+0021-0004-0Y61 (Y may be in the range 1-2) There is an electrical fault in Primer pump Y .
Solution :
1. Check that the pump and connectors are properly connected, not broken, not dirty and undamaged. 2. Run the 02103 Check Primer motor service diagnostic and check if the Primer pump status is OK. 3. Replace the Primer pump. 4. If the problem persists, replace the Engine PCA.
-
0021-0004-0162
+0021-0004-0Y62 (Y may be in the range 1-2) The Primer pump Y driver located in the Engine PCA has detected an over-temperature and it stops. NOTE: A motor driver can control more than one motor, so any of these motors can report this error if they operate at the same time. Primer pump Engine PCA
Solution :
1. Check that the pump and connectors are properly connected, not broken, not dirty and undamaged. 2. Run the 02103 Check Primer motor service diagnostic and check if the primer pump status is OK. 3. Replace the Primer pump. 4. If the problem persists, replace the Engine PCA.
-
0021-0004-0163
+0021-0004-0Y63 (Y may be in the range 1-2) Motor driver not working as expected while Primer pump Y is working.
Solution :
1. Check that the pump and connectors are properly connected, not broken, not dirty and undamaged. 2. Run the 02103 Check Primer motor service diagnostic and check if the Primer pump status is OK. 3. Replace the Primer pump. 4. If the problem persists, replace the Engine PCA.
-
0021-0004-0261
+0021-0004-0Y61 (Y may be in the range 1-2) There is an electrical fault in Primer pump Y .
Solution :
1. Check that the pump and connectors are properly connected, not broken, not dirty and undamaged. 2. Run the 02103 Check Primer motor service diagnostic and check if the Primer pump status is OK. 3. Replace the Primer pump. 4. If the problem persists, replace the Engine PCA.
-
0021-0004-0262
+0021-0004-0Y62 (Y may be in the range 1-2) The Primer pump Y driver located in the Engine PCA has detected an over-temperature and it stops. NOTE: A motor driver can control more than one motor, so any of these motors can report this error if they operate at the same time. Primer pump Engine PCA
Solution :
1. Check that the pump and connectors are properly connected, not broken, not dirty and undamaged. 2. Run the 02103 Check Primer motor service diagnostic and check if the primer pump status is OK. 3. Replace the Primer pump. 4. If the problem persists, replace the Engine PCA.
-
0021-0004-0263
+0021-0004-0Y63 (Y may be in the range 1-2) Motor driver not working as expected while Primer pump Y is working.
Solution :
1. Check that the pump and connectors are properly connected, not broken, not dirty and undamaged. 2. Run the 02103 Check Primer motor service diagnostic and check if the Primer pump status is OK. 3. Replace the Primer pump. 4. If the problem persists, replace the Engine PCA.
-
0021-0005-0009
+The printer has detected that the cable from Service Station is not properly connected to Engine PCA.
Solution :
1. Check that the Service Station (SVS) cable to the Engine PCA is unbroken, undamaged and properly connected. 2. Run the 02103 Check Primer motor service diagnostic and check if the SVS cable to mechatronics PCA presence status is OK. 3. Replace the Service Station (SVS) cable to the Engine PCA if needed. 4. If the problem persists, replace the Service Station PCA.
-
0022-0104-0005
+0022-0X04-0005 (X may be in the range 1–2) Timeout detected in ISS motor 1 (SVS side) when it is spinning and the time that it takes to complete a full rotation is longer than expected.
Solution :
1. Make sure that the ISS motor path is clear. Remove any visible obstacles (screws, plastic parts, etc.) restricting the movement of the ISS motor. 2. Check that the ISS left bundle cable is in good condition and properly connected to the ISS motor and the Engine PCA. 3. Run the 02201 Check Electronics service diagnostic and check if the ISS motor status is OK. 4. Replace the ISS motor, if needed.
-
0022-0104-0061
+0022-0X04-0061 (X may be in the range 1–2) There is an electrical fault in the ISS motor X.
Solution :
1. Make sure that the ISS motor path is clear. Remove any visible obstacles (screws, plastic parts, etc.) restricting the movement of the ISS motor. 2. Run the 02201 Check Electronics service diagnostic and check if the ISS motor status is OK. 3. Replace the ISS motor, if needed. 4. If the problem persists, replace the Engine PCA.
-
0022-0104-0062
+0022-0X04-0062 (X may be in the range 1–2) The ISS motor X driver located in the Engine PCA has detected an over-temperature and it stops. NOTE: A motor driver can control more than one motor, so any of these motors can report this error if they operate at the same time.
Solution :
1. Make sure that the ISS motor path is clear. Remove any visible obstacles (screws, plastic parts, etc.) restricting the movement of the ISS motor. 2. Run the 02201 Check Electronics service diagnostic and check if the ISS motor status is OK. 3. Replace the ISS motor, if needed. 4. If the problem persists, replace the Engine PCA.
-
0022-0104-0063
+0022-0X04-0063 (X may be in the range 1–2) Motor driver not working as expected while ISS motor X is working.
Solution :
1. Make sure that the ISS motor path is clear. Remove any visible obstacles (screws, plastic parts, etc.) restricting the movement of the ISS motor. 2. Run the 02201 Check Electronics service diagnostic and check if the ISS motor status is OK. 3. Replace the ISS motor, if needed. 4. If the problem persists, replace the Engine PCA.
-
0022-0204-0005
+0022-0X04-0005 (X may be in the range 1–2) Timeout detected in ISS motor 1 (SVS side) when it is spinning and the time that it takes to complete a full rotation is longer than expected.
Solution :
1. Make sure that the ISS motor path is clear. Remove any visible obstacles (screws, plastic parts, etc.) restricting the movement of the ISS motor. 2. Check that the ISS left bundle cable is in good condition and properly connected to the ISS motor and the Engine PCA. 3. Run the 02201 Check Electronics service diagnostic and check if the ISS motor status is OK. 4. Replace the ISS motor, if needed.
-
0022-0204-0061
+0022-0X04-0061 (X may be in the range 1–2) There is an electrical fault in the ISS motor X.
Solution :
1. Make sure that the ISS motor path is clear. Remove any visible obstacles (screws, plastic parts, etc.) restricting the movement of the ISS motor. 2. Run the 02201 Check Electronics service diagnostic and check if the ISS motor status is OK. 3. Replace the ISS motor, if needed. 4. If the problem persists, replace the Engine PCA.
-
0022-0204-0062
+0022-0X04-0062 (X may be in the range 1–2) The ISS motor X driver located in the Engine PCA has detected an over-temperature and it stops. NOTE: A motor driver can control more than one motor, so any of these motors can report this error if they operate at the same time.
Solution :
1. Make sure that the ISS motor path is clear. Remove any visible obstacles (screws, plastic parts, etc.) restricting the movement of the ISS motor. 2. Run the 02201 Check Electronics service diagnostic and check if the ISS motor status is OK. 3. Replace the ISS motor, if needed. 4. If the problem persists, replace the Engine PCA.
-
0022-0204-0063
+0022-0X04-0063 (X may be in the range 1–2) Motor driver not working as expected while ISS motor X is working.
Solution :
1. Make sure that the ISS motor path is clear. Remove any visible obstacles (screws, plastic parts, etc.) restricting the movement of the ISS motor. 2. Run the 02201 Check Electronics service diagnostic and check if the ISS motor status is OK. 3. Replace the ISS motor, if needed. 4. If the problem persists, replace the Engine PCA.
-
0045-0002-0001
+The Formatter is malfunctioning. It is possible that Data in the NVRAM is corrupted or invalid.
Solution :
1. Make sure that the printer has the latest firmware version. 2. Upgrade the firmware version. See Firmware upgrades on page 120. 3. Run the 04501 Check Mainboard service diagnostic and check if the Formatter functionality status is OK. 4. Replace the Formatter, if needed.
-
0045-0002-0003
+The firmware has detected an unsupported Formatter PCA version.
Solution :
1. Make sure that the printer has the latest firmwareversion. 2. Upgrade the firmware version. See Firmware upgrades on page 120. 3. Run the 04501 Check Mainboard service diagnostic and check if the Formatter functionality status is OK. 4. Replace the Formatter, if needed.
-
0045-0002-0021
+The temperature of the Formatter is beyond maximum margin.
Solution :
1. Check that the CPU Fan or Eebox Fan are unbroken, undamaged and properly connected. 2. Make sure that the CPU fan, Eebox Fan or Eebox cover are not blocked or dirty. 3. Run the 04501 Check Mainboard service diagnostic and check if the Formatter functionality status is OK. 4. Replace the Formatter, if needed.
-
0045-0002-0040
+To keep the date and time correct when the printer is not plugged there is a 3.3 V battery in Formatter. If the printer is left for too long without being connected to power this battery will eventually discharge. This SE is to notify the user to replace the battery, but the printer may continue to work perfectly.
Solution :
1. Check that the battery is properly connected. 2. Replace the battery, if needed.
-
0045-0002-0067
+The firmware has detected an unsupported Formatter's internal FW version.
Solution :
1. Make sure that the printer has the latest firmware version. 2. Upgrade the firmware fversion. See Appendix A: Updating firmware in boot mode on page 292. 3. Run the 00105 Check Disk service diagnostic and check if the Hard Disk status is OK. 4. Change the Hard Disk using the 00107 Reset HDD to be removed diagnostic if needed. 5. Replace the Formatter PCA, if needed.
-
0045-0002-0069
+The firmware has detected a Formatter's internal firmware firmware firmware firmware issue.
Solution :
1. Make sure that the printer has the latest firmware version. 2. Upgrade the firmware firmware firmware firmware version. See Appendix A: Updating firmware in boot mode on page 292. 3. Run the 00105 Check Disk service diagnostic and check if the Hard Disk status is OK. 4. Change the Hard Disk using the 00107 Reset HDD to be removed diagnostic if needed. 5. Replace the Formatter PCA, if needed.
-
0045-0002-0078
+BIOS version has to be updated.
Solution :
1. Make sure that the printer has the latest firmware version. 2. Upgrade the firmware firmware version. See Appendix A: Updating firmware in boot mode on page 292. 3. Run the 04501 Check Mainboard service diagnostic and check if the Formatter functionality status is OK. 4. Replace the Formatter, if needed.
-
0045-0002-0089
+HDD Wrong model/mismatch. Printer detects a non valid HDD version or bad partitioned HDD
Solution :
1. Check that the HDD cable to Formatter PCA is unbroken, undamaged and properly connected. 2. Re-image HDD or replace the HDD having previously used the00107 Reset HDD to be removed service diagnostic. Insert a USB device with a firmware file file named firmware.fmw and follow the instructions appearing in the How to replace HDD guide. 3. If the problem persists, replace the Formatter PCA.
-
0045-0004-0001
+Cannot communicate with JDI microcontroller.
Solution :
1. Run the 00103 Check connectivity service diagnostic and check if the connectivity board status is OK. 2. Run the 09901 Hard reset connectivity service diagnostic and reset its internal configuration. 3. Replace the Formatter, if needed.
-
0045-0004-0002
+JDI microcontroller initialization error.
Solution :
1. Run the 00103 Check connectivity service diagnostic and check if the connectivity board status is OK. 2. Run the 09901 Hard reset connectivity service diagnostic and reset its internal configuration. 3. Replace the Formatter, if needed.
-
0045-0004-0043
+JDI memory corrupted or Failure.
Solution :
1. Run the 00103 Check connectivity service diagnostic and check if the connectivity board status is OK. 2. Run the 09901 Hard reset connectivity service diagnostic and reset its internal configuration. 3. Replace the Formatter, if needed.
-
0045-0004-0086
+JDI MAC direction not configured or lost.
Solution :
1. Run the 00103 Check connectivity service diagnostic and check if the connectivity board status is OK. 2. Run the 09901 Hard reset connectivity service diagnostic and reset its internal configuration. 3. Replace the Formatter, if needed.
-
0045-0008-0102
+HDD not present or not detected.
Solution :
1. Check that the HDD cable to Formatter PCA is unbroken, undamaged and properly connected. 2. Re-image HDD or replace the HDD having previously used the00107 Reset HDD to be removed service diagnostic. 3. If the problem persists, replace the Formatter PCA.
-
0045-0008-0140
+Printer detects HDD as empty.
Solution :
1. Check that the HDD cable to Formatter PCA is unbroken, undamaged and properly connected. 2. Re-image HDD or replace the HDD having previously used the00107 Reset HDD to be removed service diagnostic. 3. If the problem persists, replace the Formatter PCA.
-
0045-0008-0143
+Printer detects HDD with a partition issue.
Solution :
1. Check if the cable from the Hard Disk to the Formatter PCA is unbroken, undamaged and properly connected. 2. Re-image HDD or replace the HDD having previously used the 00107 Reset HDD to be removed. 3. If the problem persists, replace the Formatter PCA.
-
0045-0008-0174
+The printer has detected a problem with NVM configuration from the Hard Disk.
Solution :
1. Check if the cable from the Hard Disk to the Formatter PCA is unbroken, undamaged and properly connected. 2. Run the 00105 Check Disk service diagnostic and check if the HDD status is OK. 3. If the HDD status is not OK, replace the HDD, using previously the 00107 Reset HDD to be removed service diagnostic.
-
0045-0008-0180
+HDD Failed to mount rootfs. Printer does not detect a valid boot loader in the HDD.
Solution :
1. Check that the HDD cable to Formatter PCA is unbroken, undamaged and properly connected. 2. Re-image HDD or replace the HDD having previously used the00107 Reset HDD to be removed service diagnostic. 3. If the problem persists, replace the Formatter PCA.
-
0045-0008-0181
+HDD Boot loader issue. Printer does not detect a valid boot loader in the HDD.
Solution :
1. Check that the HDD cable to Formatter PCA is unbroken, undamaged and properly connected. 2. Re-image HDD or replace the HDD having previously used the00107 Reset HDD to be removed service diagnostic. 3. If the problem persists, replace the Formatter PCA.
-
0045-0008-0182
+HDD Boot loader error. Printer does not detect a valid boot loader in the HDD.
Solution :
1. Check that the HDD cable to Formatter PCA is unbroken, undamaged and properly connected. 2. Re-image HDD or replace the HDD having previously used the00107 Reset HDD to be removed service diagnostic. 3. If the problem persists, replace the Formatter PCA.
-
0045-0008-0184
+HDD Failed to mount packages. Printer does not detect a valid boot loader in the HDD.
Solution :
1. Check that the HDD cable to Formatter PCA is unbroken, undamaged and properly connected. 2. Re-image HDD or replace the HDD having previously used the00107 Reset HDD to be removed service diagnostic. 3. If the problem persists, replace the Formatter PCA.
-
0045-0008-0185
+HDD Failed to run triggers.
Solution :
1. Check that the HDD cable to Formatter PCA is unbroken, undamaged and properly connected. 2. Re-image HDD or replace the HDD having previously used the00107 Reset HDD to be removed service diagnostic. 3. If the problem persists, replace the Formatter PCA.
-
0045-0008-0197
+HDD PWD locked. The HDD is locked and can not be access.
Solution :
1. Check that the HDD cable to Formatter PCA is unbroken, undamaged and properly connected. 2. Re-image HDD or replace the HDD having previously used the00107 Reset HDD to be removed service diagnostic. 3. If the problem persists, replace the Formatter PCA.
-
0045-0008-0240
+HDD (BIOS) Empty / Not purged / Low Battery.
Solution :
1. Check that the HDD cable to Formatter PCA is unbroken, undamaged and properly connected. 2. Re-image HDD or replace the HDD having previously used the00107 Reset HDD to be removed service diagnostic. 3. If the problem persists, replace the Formatter PCA.
-
0045-0011-0081
+USB Boot loader issue. Printer does not detect a valid boot loader in the USB.
Solution :
1. Check that Formatter does not have an USB flash drive connected. 2. If the problem persists, replace the Formatter PCA.
-
0046-0000-0002
+The printer is unable to detect the Printer ID PCA or Fuse 3v3 flown in Engine PCA.
Solution :
1. Power off the printer and wait 20 minutes before powering it up again. 2. Run the 04601 Check Printer ID electronics diagnostic and check if the Printer ID PCA status is OK. 3. Check that the Printer ID PCA is not broken and undamaged and it is properly connected to the Formatter PCA. 4. Check that the fuses F19 or F20 in Engine PCA are flown, flown, replace Engine PCA if needed. 5. Order a CryptoASIC Service Kit. Escalate to Level 3, providing the printer’s serial number and product number, and the serial number of the CryptoASIC SIM shown after scanning the QR code that can be found in the card itself. If it’s not possible to scan the QR code, please share a clear photo showing all the information from the SIM card. Replace the Printer ID PCA. Write the file file provided by Level 3 to a USB flash drive, previously formatted in FAT32. Plug the USB flash drive into the printer and restart. If startup fails, enable the diagnostic package with the USB flash drive and provide system logs to Level 3. 6. If the problem persists, replace the Engine PCA.
-
0046-0000-0082
+The printer has detected a hardware problem with the Printer ID PCA.
Solution :
1. Run the 04601 Check Printer ID electronics diagnostic and check if the Printer ID PCA status is OK. 2. Check that the Printer ID PCA is not broken and undamaged and it is properly connected to the Formatter PCA. 3. Order a CryptoASIC Service Kit. Escalate to Level 3, providing the printer’s serial number and product number, and the serial number of the CryptoASIC SIM shown after scanning the QR code that can be found in the card itself. If it’s not possible to scan the QR code, please share a clear photo showing all the information from the SIM card. Replace the Printer ID PCA. Write the file file provided by Level 3 to a USB flashflash drive, previously formatted in FAT32. Plug the USB flash drive into the printer and restart. If startup fails, enable the diagnostic package with the USB flash drive and provide system logs to Level 3. 4. If the problem persists, replace the Engine PCA.
-
0046-0000-0083
+The printer has detected that installed Printer ID PCA family configuration configuration does not match with the real printer family.
Solution :
1. Run the 04601 Check Printer ID electronics diagnostic and check if the Printer ID PCA status is OK. 2. Check that the Printer ID PCA is not broken and undamaged and it is properly connected to the Formatter PCA. 3. Order a CryptoASIC Service Kit. Escalate to Level 3, providing the printer’s serial number and product number, and the serial number of the CryptoASIC SIM shown after scanning the QR code that can be found in the card itself. If it’s not possible to scan the QR code, please share a clear photo showing all the information from the SIM card. Replace the Printer ID PCA. Write the file file provided by Level 3 to a USB flashflash drive, previously formatted in FAT32. Plug the USB flash drive into the printer and restart. If startup fails, enable the diagnostic package with the USB flash drive and provide system logs to Level 3. 4. If the problem persists, replace the Engine PCA.
-
0046-0000-0084
+The printer has detected that its Printer ID PCA has a serial number that belongs to an another product.
Solution :
1. Run the 04601 Check Printer ID electronics diagnostic and check if the Printer ID PCA status is OK. 2. Check that the Printer ID PCA is not broken and undamaged and it is properly connected to the Formatter PCA. 3. Order a CryptoASIC Service Kit. Escalate to Level 3, providing the printer’s serial number and product number, and the serial number of the CryptoASIC SIM shown after scanning the QR code that can be found in the card itself. If it’s not possible to scan the QR code, please share a clear photo showing all the information from the SIM card. Replace the Printer ID PCA. Write the file file provided by Level 3 to a USB flash drive, previously formatted in FAT32. Plug the USB flash drive into the printer and restart. If startup fails, enable the diagnostic package with the USB flash drive and provide system logs to Level 3. 4. If the problem persists, replace the Engine PCA.
-
0046-0000-0087
+The printer has detected a hardware problem with the Printer ID PCA.
Solution :
1. Run the 04601 Check Printer ID electronics diagnostic and check if the Printer ID PCA status is OK. 2. Check that the Printer ID PCA is not broken and undamaged and it is properly connected to the Formatter PCA. 3. Order a CryptoASIC Service Kit. Escalate to Level 3, providing the printer’s serial number and product number, and the serial number of the CryptoASIC SIM shown after scanning the QR code that can be found in the card itself. If it’s not possible to scan the QR code, please share a clear photo showing all the information from the SIM card. Replace the Printer ID PCA. Write the file file provided by Level 3 to a USB flashflash drive, previously formatted in FAT32. Plug the USB flash drive into the printer and restart. If startup fails, enable the diagnostic package with the USB flash drive and provide system logs to Level 3. 4. If the problem persists, replace the Engine PCA.
-
0046-0000-0099
+The printer has detected a hardware problem with the Printer ID PCA.
Solution :
1. Run the 04601 Check Printer ID electronics diagnostic and check if the Printer ID PCA status is OK. 2. Check that the Printer ID PCA is not broken and undamaged and it is properly connected to the Formatter PCA. 3. Order a CryptoASIC Service Kit. Escalate to Level 3, providing the printer’s serial number and product number, and the serial number of the CryptoASIC SIM shown after scanning the QR code that can be found in the card itself. If it’s not possible to scan the QR code, please share a clear photo showing all the information from the SIM card. Replace the Printer ID PCA. Write the file file provided by Level 3 to a USB flashflash drive, previously formatted in FAT32. Plug the USB flash drive into the printer and restart. If startup fails, enable the diagnostic package with the USB flash drive and provide system logs to Level 3. 4. If the problem persists, replace the Engine PCA.
-
0060-0001-0159
+0060-0001-0Y59 (Y may be in the range 1–2) The Rewinder motor Y suddenly stops or fails while it is working.
Solution :
1. Make sure that the Rewinder motor path is clear. Remove any visible obstacles (screws, plastic parts, etc.) restricting the movement of the Rewinder motor. 2. Check that the motor, encoder and connectors are not broken, not dirty and undamaged. 3. Check that Power right bundle cable is in good condition and properly connected to the Rewinder motor and the Engine PCA. 4. Run the 06001 Check Rewinder motor service diagnostic and check if the Rewinder motor status is OK. 5. Replace the Rewinder motor, if needed.
-
0060-0001-0160
+0060-0001-0Y60 (Y may be in the range 1–2) During boot-up, the direction test for the Rewinder motor Y has failed.
Solution :
1. Make sure that the media path is clear. Remove any visible obstacles (screws, plastic parts, etc.) restricting the movement in the cutter. 2. Check that the the motor, encoder and connectors are not broken, not dirty and undamaged. 3. Check that the Power right bundle cable is in good condition and properly connected to the Rewinder motor and the Engine PCA. 4. Run the 06001 Check Rewinder motor service diagnostic and check if the Rewinder motor status is OK. 5. Replace the Rewinder motor, if needed.
-
0060-0001-0161
+0060-0001-0Y61 (Y may be in the range 1–2) There is an electrical fault in Rewinder motor Y.
Solution :
1. Check that the motor, encoder and connectors are not broken, not dirty and undamaged. 2. Run the 06001 Check Rewinder motor service diagnostic and check if the Rewinder motor status is OK. 3. Replace the Rewinder motor, if needed. 4. If the problem persists, replace the Engine PCA.
-
0060-0001-0162
+0060-0001-0Y62 (Y may be in the range 1–2) The Rewinder motor Y driver located in the Engine PCA has detected an over-temperature and it stops. NOTE: A motor driver can control more than one motor, so any of these motors can report this error if they operate at the same time.
Solution :
1. Check that the motor, encoder and connectors are not broken, not dirty and undamaged. 2. Run the 06001 Check Rewinder motor service diagnostic and check if the Rewinder motor status is OK. 3. Replace the Rewinder motor, if needed. 4. If the problem persists, replace the Engine PCA.
-
0060-0001-0163
+0060-0001-0Y63 (Y may be in the range 1–2) Motor driver not working as expected while the Rewinder motor Y is working.
Solution :
1. Check that the motor, encoder and connectors arenot broken, not dirty and undamaged. 2. Run the 06001 Check Rewinder motor service diagnostic and check if the Rewinder motor status is OK. 3. Replace the Rewinder motor, if needed. 4. If the problem persists, replace the Engine PCA.
-
0060-0001-0259
+0060-0001-0Y59 (Y may be in the range 1–2) The Rewinder motor Y suddenly stops or fails while it is working.
Solution :
1. Make sure that the Rewinder motor path is clear. Remove any visible obstacles (screws, plastic parts, etc.) restricting the movement of the Rewinder motor. 2. Check that the motor, encoder and connectors are not broken, not dirty and undamaged. 3. Check that Power right bundle cable is in good condition and properly connected to the Rewinder motor and the Engine PCA. 4. Run the 06001 Check Rewinder motor service diagnostic and check if the Rewinder motor status is OK. 5. Replace the Rewinder motor, if needed.
-
0060-0001-0260
+0060-0001-0Y60 (Y may be in the range 1–2) During boot-up, the direction test for the Rewinder motor Y has failed.
Solution :
1. Make sure that the media path is clear. Remove any visible obstacles (screws, plastic parts, etc.) restricting the movement in the cutter. 2. Check that the the motor, encoder and connectors are not broken, not dirty and undamaged. 3. Check that the Power right bundle cable is in good condition and properly connected to the Rewinder motor and the Engine PCA. 4. Run the 06001 Check Rewinder motor service diagnostic and check if the Rewinder motor status is OK. 5. Replace the Rewinder motor, if needed.
-
0060-0001-0261
+0060-0001-0Y61 (Y may be in the range 1–2) There is an electrical fault in Rewinder motor Y.
Solution :
1. Check that the motor, encoder and connectors are not broken, not dirty and undamaged. 2. Run the 06001 Check Rewinder motor service diagnostic and check if the Rewinder motor status is OK. 3. Replace the Rewinder motor, if needed. 4. If the problem persists, replace the Engine PCA.
-
0060-0001-0262
+0060-0001-0Y62 (Y may be in the range 1–2) The Rewinder motor Y driver located in the Engine PCA has detected an over-temperature and it stops. NOTE: A motor driver can control more than one motor, so any of these motors can report this error if they operate at the same time.
Solution :
1. Check that the motor, encoder and connectors are not broken, not dirty and undamaged. 2. Run the 06001 Check Rewinder motor service diagnostic and check if the Rewinder motor status is OK. 3. Replace the Rewinder motor, if needed. 4. If the problem persists, replace the Engine PCA.
-
0060-0001-0263
+0060-0001-0Y63 (Y may be in the range 1–2) Motor driver not working as expected while the Rewinder motor Y is working.
Solution :
1. Check that the motor, encoder and connectors arenot broken, not dirty and undamaged. 2. Run the 06001 Check Rewinder motor service diagnostic and check if the Rewinder motor status is OK. 3. Replace the Rewinder motor, if needed. 4. If the problem persists, replace the Engine PCA.
-
0065-0001-0001
+OPTO sensor has an electrical or mechanical issue that does not assure its functionality.
Solution :
1. Check the media path input for possible paper scraps and/or debris. 2. Check that the OPTO sensor and connector are properly connected, not broken, not dirty and undamaged. 3. Make sure that the OPTO sensor media path is clear. Remove any visible obstacles (screws, plastic parts, etc.) 4. Check that Signal right bundle cable is in good condition and properly connected to Engine PCA. 5. Run the 06505 Check Media motor and sensor service diagnostic and check if the OPTO sensor status is OK. 6. Replace the OPTO sensor, if needed.
-
0065-0001-0002
+The printer has not been able to detect the OPTO sensor presence.
Solution :
1. Check that the OPTO sensor and connector are properly connected, not broken, not dirty and undamaged. 2. Check that Signal right bundle cable is in good condition and properly connected to Engine PCA. 3. Run the 06505 Check Media motor and sensor service diagnostic and check if the OPTO sensor status is OK. 4. Replace the OPTO sensor, if needed.
-
0065-0002-0008
+The printer has detected a jam that does not let Media motor performs the expected movement properly.
Solution :
1. Make sure that the media path is clear. Remove any visible obstacles (screws, plastic parts, etc.) restricting the movement of the Media motor. 2. Check that the Media motor is properly connected, not broken, not dirty and undamaged. 3. Check that the Power left bundle cable is in good condition and properly connected to Media motor and the Engine PCA. 4. Run the 06505 Check Media motor and sensor Service diagnostic and check if the Media motor status is OK. 5. Replace the Media motor, if needed
-
0065-0002-0009
+Only in Auto-Diagnostic test. Try to move the Media motor, it does not move but the encoder works correctly.
Solution :
1. Make sure that the media path is clear. Remove any visible obstacles (screws, plastic parts, etc.) restricting the movement of the Media motor. 2. Check that the Media motor is properly connected, not broken, not dirty and undamaged. 3. Check that the Power left bundle cable is in good condition and properly connected to Media motor and the Engine PCA. 4. Run the 06505 Check Media motor and sensor Service diagnostic and check if the Media motor status is OK. 5. Replace the Media motor, if needed.
-
0065-0002-0059
+The Media motor suddenly stops or fails while it is working.
Solution :
1. Make sure that the media path is clear. Remove any visible obstacles (screws, plastic parts, etc.) restricting the movement of the Media motor. 2. Check that the Media motor, Analog encoder and connectors are properly connected, not broken, not dirty and undamaged (see Motor Media Advance Transmission with Encoder on page 568). 3. Check that the Power left bundle cable is in good condition and properly connected to the Media motor and the Engine PCA. 4. Run the 06505 Check Media motor and sensor service diagnostic and check if the Media motor status is OK. 5. Replace the Analog encoder, if needed (see Motor Media Advance Transmission with Encoder on page 568). 6. Replace the Media motor, if needed
-
0065-0002-0060
+During boot-up, the direction test for Media motor has failed.
Solution :
1. Make sure that the media path is clear. Remove any visible obstacles (screws, plastic parts, etc.) restricting the movement of the Media motor. 2. Check that the Media motor, Analog encoder and connectors are properly connected, not broken, not dirty and undamaged (see Motor Media Advance Transmission with Encoder on page 568). 3. Check that the Power left bundle cable is in good condition and properly connected to the Media motor and the Engine PCA. 4. Run the 06505 Check Media motor and sensor service diagnostic and check if the Media motor status is OK. 5. Replace the Analog encoder, if needed (see Motor Media Advance Transmission with Encoder on page 568). 6. Replace the Media motor, if needed
-
0065-0002-0061
+There is an electrical fault in Media motor.
Solution :
1. Check that the Media motor, Analog encoder and connectors are properly connected, not broken, not dirty and undamaged (see Motor Media Advance Transmission with Encoder on page 568). 2. Run the 06505 Check Media motor and sensor service diagnostic and check if the Media motor status is OK. 3. Replace the Media motor, if needed (see Motor Media Advance Transmission with Encoder on page 568). 4. If the problem persists, replace the Engine PCA.
-
0065-0002-0062
+The Media motor driver located in the Engine PCA has detected an over-temperature and it stops. NOTE: A motor driver can control more than one motor, so any of these motors can report this error if they operate at the same time.
Solution :
1. Check that the Media motor, Analog encoder and connectors are properly connected, not broken, not dirty and undamaged (see Motor Media Advance Transmission with Encoder on page 568). 2. Run the 06505 Check Media motor and sensor service diagnostic and check if the Media motor status is OK. 3. Replace the Media motor, if needed (see Motor Media Advance Transmission with Encoder on page 568). 4. If the problem persists, replace the Engine PCA.
-
0065-0002-0063
+Motor driver not working as expected while Media motor is working.
Solution :
1. Check that the Media motor, Analog encoder and connectors are properly connected, not broken, not dirty and undamaged (see Motor Media Advance Transmission with Encoder on page 568). 2. Run the 06505 Check Media motor and sensor service diagnostic and check if the Media motor status is OK. 3. Replace the Media motor, if needed (see Motor Media Advance Transmission with Encoder on page 568). 4. If the problem persists, replace the Engine PCA.
-
0065-0003-0046
+Only in Auto-Diagnostic test. At the end of the Media motor check, try to calibrate the analog encoder and it can not do it.
Solution :
1. Check that the Media motor, Analog encoder and connectors are properly connected, not broken, not dirty and undamaged (see Motor Media Advance Transmission with Encoder on page 568). 2. Check that the Signal left bundle cable is in good condition and properly connected to Engine PCA. 3. Run the 06501 Check Electronics Service diagnostic and check if the Analog Encoder status is OK. 4. Replace the Analog encoder, if needed.
-
0065-0003-0047
+Analog encoder fails when moving Media Motor and zero cannot be found.
Solution :
1. Check that the Media motor, Analog encoder and connectors are properly connected, not broken, not dirty and undamaged (see Motor Media Advance Transmission with Encoder on page 568). 2. Check that the Signal left bundle cable is in good condition and properly connected to Engine PCA. 3. Run the 06501 Check Electronics Service diagnostic and check if the Analog Encoder status is OK. 4. Replace the Analog encoder, if needed.
-
0065-0003-0074
+NVM backup read failure, can not be accessed or NVM default values found. This NVM is located in the analog encoder PCA.
Solution :
1. Check that the Media motor, Analog encoder and connectors are properly connected, not broken, not dirty and undamaged (see Motor Media Advance Transmission with Encoder on page 568). 2. Check that the Signal left bundle cable is in good condition and properly connected to Engine PCA. 3. Run the 06501 Check Electronics Service diagnostic and check if the Analog Encoder status is OK. 4. Replace the Analog encoder, if needed.
-
0065-0004-0059
+The Pinch lifter motor suddenly stops or fails while it is working.
Solution :
1. Make sure that the Pinch lifter path is clear. Remove any visible obstacles (screws, plastic parts, etc.) restricting the movement of the Pinch lifter motor. 2. Check that the Pinch lifter motor and connectors are properly connected, not broken, not dirty and undamaged (see Auto Pinch Lifter on page 438). 3. Check that the Power right bundle cable is in good condition and properly connected to the Pinch lifter motor and the Engine PCA. 4. Run the 06506 Check Pinch lifter service diagnostic and check if the Pinch lifter motor status is OK. 5. Replace the Pinch lifter motor, if needed
-
0065-0004-0061
+There is an electrical fault in the Pinch lifter motor.
Solution :
1. Check that the Pinch lifter motor and connectors are properly connected, not broken, not dirty and undamaged (see Auto Pinch Lifter on page 438). 2. Run the 06506 Check Pinch lifter service diagnostic and check if the Pinch lifter motor status is OK. 3. Replace the Pinch lifter motor, if needed (see Auto Pinch Lifter on page 438). 4. If the problem persists, replace the Engine PCA.
-
0065-0004-0062
+The Pinch lifter motor driver located in the Engine PCA has detected an over-temperature and it stops. NOTE: A motor driver can control more than one motor, so any of these motors can report this error if they operate at the same time.
Solution :
1. Check that the Pinch lifter motor and connectors are properly connected, not broken, not dirty and undamaged (see Auto Pinch Lifter on page 438). 2. Run the 06506 Check Pinch lifter service diagnostic and check if the Pinch lifter motor status is OK. 3. Replace the Pinch lifter motor, if needed (see Auto Pinch Lifter on page 438). 4. If the problem persists, replace the Engine PCA.
-
0065-0004-0063
+Motor driver not working as expected while Pinch lifter motor is working.
Solution :
1. Check that the Pinch lifter motor and connectors are properly connected, not broken, not dirty and undamaged (see Auto Pinch Lifter on page 438). 2. Run the 06506 Check Pinch lifter service diagnostic and check if the Pinch lifter motor status is OK. 3. Replace the Pinch lifter motor, if needed (see Auto Pinch Lifter on page 438). 4. If the problem persists, replace the Engine PCA. Error Code Parts Catalog Service Mode, Troubleshooting Downloads Files Compatibility Used abbreviations Eng Discounts Payments Privacy, Terms, Refunds Total in database Brands: 24 Models: 9178 HP: 750 PrintCopy .info service 2001 - 2026 Advertisement
-
0065-0005-0001
+The Pinch lifter EOT sensor has an electrical or mechanical issue that does not assure its functionality.
Solution :
1. Check that the Pinch Lifter EOT sensor and connector are properly connected, not broken, not dirty and undamaged. 2. Make sure that the Pinch Lifter media path is clear. Remove any visible obstacles (screws, plastic parts, etc.) 3. Run the 06506 Check Pinches Lifter Service diagnostic and check if the Pinch Lifter EOT sensor status is OK. 4. Replace the Pinch Lifter EOT sensor, if needed.
-
0065-0005-0002
+The printer has not been able to detect the Pinch Lifter EOT sensor presence.
Solution :
1. Check that the Pinch Lifter EOT sensor and connector are properly connected, not broken, not dirty and undamaged. 2. Check that Signal right bundle cable is in good condition and properly connected to Engine PCA. 3. Run the 06506 Check Pinches Lifter Service diagnostic and check if the Pinch Lifter EOT sensor status is OK. 4. Replace the Pinch Lifter EOT sensor, if needed.
-
0065-0006-0008
+The printer has detected a jam that does not let Media motor performs the expected movement properly.
Solution :
1. Make sure that the media path is clear. Remove any visible obstacles (screws, plastic parts, etc.) restricting the movement in the carriage. 2. Check that the Scan axis Motor is not broken, not dirty and undamaged. See Scan-axis motor on page 609. 3. Check that Power left bundle cable is in good condition and properly connected to Scan axis motor and the Engine PCA. 4. Check that linear encoder is not bent due to Carriage PCA bad position, dirty or damaged. Check also if linear encoder sensor from Carriage PCA (see Carriage PCA on page 466) is broken or damage. 5. Run the 06504 Check Scan motor Service diagnostic and check if the Scan axis motor status is OK. 6. Replace linear strip encoder, if needed (see Line Sensor on page 560). 7. Replace the Scan axis motor, if needed (see Scan-axis motor on page 609). 8. If the problem persists, replace the Carriage PCA.
-
0065-0006-0059
+The Scan-axis motor suddenly stops or fails while it is working.
Solution :
1. Make sure that the media path is clear. Remove any visible obstacles (screws, plastic parts, etc.) restricting the movement in the Carriage. 2. Check that the Scan-axis motor is not broken, not dirty and undamaged (see Scan-axis motor (CR357-67023) on page 612). 3. Check that the Power left bundle cable is in good condition and properly connected to the Scan–axis motor and the Engine PCA. 4. Check that the linear encoder is not bent due to Carriage PCA bad position, dirty or damaged. Check also if the linear encoder sensor from the Carriage PCA is broken or damage (see Carriage PCA on page 466). 5. Run the 06504 Check Scan–axis motor service diagnostic and check if the Scan–axis motor status is OK. 6. Replace the Encoder strip, if needed (see Encoder Strip (CR357-67022) on page 517). 7. Replace the Scan-axis motor, if needed (see Scan-axis motor (CR357-67023) on page 612). 8. If the problem persists, replace the Carriage PCA.
-
0065-0006-0060
+During boot-up, the direction test for Scan-axis motor has failed.
Solution :
1. Make sure that the media path is clear. Remove any visible obstacles (screws, plastic parts, etc.) restricting the movement in the Carriage. 2. Check that the Scan-axis motor is not broken, not dirty and undamaged (see Scan-axis motor (CR357-67023) on page 612). 3. Check that the Power left bundle cable is in good condition and properly connected to the Scan–axis motor and the Engine PCA. 4. Check that the linear encoder is not bent due to Carriage PCA bad position, dirty or damaged. Check also if the linear encoder sensor from the Carriage PCA is broken or damage (see Carriage PCA on page 466). 5. Run the 06504 Check Scan–axis motor service diagnostic and check if the Scan–axis motor status is OK. 6. Replace the Encoder strip, if needed (see Encoder Strip (CR357-67022) on page 517). 7. Replace the Scan-axis motor, if needed (see Scan-axis motor (CR357-67023) on page 612). 8. If the problem persists, replace the Carriage PCA.
-
0065-0006-0061
+There is an electrical fault in Scan-axis motor.
Solution :
1. Check that the Scan-axis motor is not broken, not dirty and undamaged (see Scan-axis motor (CR357-67023) on page 612). 2. Run the 06504 Check Scan–axis motor service diagnostic and check if the Scan–axis motor status is OK. 3. Replace the Scan-axis motor, if needed (see Scan-axis motor (CR357-67023) on page 612). 4. If the problem persists, replace the Engine PCA. Error Code Parts Catalog Service Mode, Troubleshooting Downloads Files Compatibility Used abbreviations Eng Discounts Payments Privacy, Terms, Refunds Total in database Brands: 24 Models: 9178 HP: 750 PrintCopy .info service 2001 - 2026 Next page Next page
-
0065-0006-0062
+The Scan-axis motor driver located in the Engine PCA has detected an over-temperature and it stops. NOTE: A motor driver can control more than one motor, so any of these motors can report this error if they operate at the same time.
Solution :
1. Check that the Scan-axis motor is not broken, not dirty and undamaged (see Scan-axis motor (CR357-67023) on page 612). 2. Run the 06504 Check Scan–axis motor service diagnostic and check if the Scan–axis motor status is OK. 3. Replace the Scan-axis motor, if needed (see Scan-axis motor (CR357-67023) on page 612). 4. If the problem persists, replace the Engine PCA.
-
0065-0006-0063
+Motor driver not working as expected while Scan-axis motor is working.
Solution :
1. Check that the Scan-axis motor is not broken, not dirty and undamaged (see Scan-axis motor (CR357-67023) on page 612). 2. Run the 06504 Check Scan–axis motor service diagnostic and check if the Scan–axis motor status is OK. 3. Replace the Scan-axis motor, if needed (see Scan-axis motor (CR357-67023) on page 612). 4. If the problem persists, replace the Engine PCA.
-
0065-0007-0017
+There is an electrical or mechanical issue with PRS solenoid that does not assure the carriage move correctly.
Solution :
1. Check that the PRS solenoid is not broken, not dirty and undamaged. 2. Run the 06503 Check PRS Service Diagnostic and check if the PRS Solenoid status is OK. 3. Replace the PRS Solenoid, if needed. 4. If the problem persists, replace the Engine PCA.
-
0065-0007-0080
+The PRS solenoid has not moved while been activated.
Solution :
1. Check that the PRS solenoid is not broken, not dirty and undamaged. 2. Run the 06503 Check PRS Service Diagnostic and check if the PRS Solenoid status is OK. 3. Replace the PRS Solenoid, if needed. 4. If the problem persists, replace the Engine PCA.
-
0065-0007-0081
+The PRS solenoid has not moved after been deactivated.
Solution :
1. Check that the PRS solenoid is not broken, not dirty and undamaged. 2. Run the 06503 Check PRS Service Diagnostic and check if the PRS Solenoid status is OK. 3. Replace the PRS Solenoid, if needed. 4. If the problem persists, replace the Engine PCA.
-
0065-0008-0059
+The Starwheel motor suddenly stops or fails while it is working.
Solution :
1. Make sure that the Starwheel mechanism is clear. Remove any visible obstacles (screws, plastic parts, etc.) restricting the movement of the Starwheel path. 2. Check that the Starwheel motor and connectors are properly connected, not broken, not dirty and undamaged (see Starwheel Motor on page 647). 3. Check that the Power left bundle cable is in good condition and properly connected to the Starwheel motor and the Engine PCA. 4. Run the 06502 Check Starwheel motor and sensor service diagnostic and check if the Starwheel motor status is OK. 5. Replace the Starwheel motor, if needed Error Code Parts Catalog Service Mode, Troubleshooting Downloads Files Compatibility Used abbreviations Eng Discounts Payments Privacy, Terms, Refunds Total in database Brands: 24 Models: 9178 HP: 750 PrintCopy .info service 2001 - 2026 Advertisement Advertisement
-
0065-0008-0060
+During boot-up, the direction test for Starwheel motor has failed.
Solution :
1. Make sure that the Starwheel mechanism is clear. Remove any visible obstacles (screws, plastic parts, etc.) restricting the movement of the Starwheel path. 2. Check that the Starwheel motor and connectors are properly connected, not broken, not dirty and undamaged 3. Check that the Power left bundle cable is in good condition and properly connected to the Starwheel motor and the Engine PCA. 4. Run the 06502 Check Starwheel motor and sensor service diagnostic and check if the Starwheel motor status is OK. 5. Replace the Starwheel motor, if needed
-
0065-0008-0061
+There is an electrical fault in Starwheel motor.
Solution :
1. Check that the Starwheel motor and connectors are properly connected, not broken, not dirty and undamaged (see Starwheel Motor on page 647). 2. Run the 06502 Check Starwheel motor and sensor service diagnostic and check if the Starwheel motor status is OK. 3. Replace the Starwheel motor, if needed (see Starwheel Motor on page 647). 4. If the problem persists, replace the Engine PCA.
-
0065-0008-0062
+The Starwheel motor driver located in the Engine PCA has detected an over-temperature and it stops. NOTE: A motor driver can control more than one motor, so any of these motors can report this error if they operate at the same time.
Solution :
1. Check that the Starwheel motor and connectors are properly connected, not broken, not dirty and undamaged (see Starwheel Motor on page 647). 2. Run the 06502 Check Starwheel motor and sensor service diagnostic and check if the Starwheel motor status is OK. 3. Replace the Starwheel motor, if needed (see Starwheel Motor on page 647). 4. If the problem persists, replace the Engine PCA.
-
0065-0008-0063
+Motor driver not working as expected while Starwheel motor is working.
Solution :
1. Check that the Starwheel motor and connectors are properly connected, not broken, not dirty and undamaged (see Starwheel Motor on page 647). 2. Run the 06502 Check Starwheel motor and sensor service diagnostic and check if the Starwheel motor status is OK. 3. Replace the Starwheel motor, if needed (see Starwheel Motor on page 647). 4. If the problem persists, replace the Engine PCA.
-
0065-0009-0001
+The Starwheels EOT sensor has an electrical or mechanical issue that does not assure its functionality.
Solution :
1. Check that the Starwheels EOT sensor and connector are properly connected, not broken, not dirty and undamaged. 2. Make sure that the Starwheels media path is clear. Remove any visible obstacles (screws, plastic parts, etc.) 3. Check that Signal left bundle cable is in good condition and properly connected to Engine PCA. 4. Run the 06502 Check Starwheel motor and sensor service diagnostic and check if the Starwheel EOT status is OK. 5. Replace the Starwheels EOT sensor, if needed.
-
0065-0009-0002
+The printer has not been able to detect the Starwheels EOT sensor presence.
Solution :
1. Check that the Starwheels EOT sensor and connector are properly connected, not broken, not dirty and undamaged. 2. Check that Signal left bundle cable is in good condition and properly connected to Engine PCA. 3. Run the 06502 Check Starwheel motor and sensor service diagnostic and check if the Starwheel EOT status is OK. 4. Replace the Starwheels EOT sensor, if needed. Error Code Parts Catalog Service Mode, Troubleshooting Downloads Files Compatibility Used abbreviations Eng Discounts Payments Privacy, Terms, Refunds Total in database Brands: 24 Models: 9178 HP: 750 PrintCopy .info service 2001 - 2026
-
0065-0010-0059
+The Overdrive motor suddenly stops or fails while it is working.
Solution :
1. Make sure that the integrated stacker is clear. Remove any visible obstacles (screws, plastic parts, etc.) restricting the movement in the media path. 2. Check that the Overdrive motor and connectors are properly connected, not broken, not dirty and undamaged (see Overdrive on page 584). 3. Check that the Power right bundle cable is in good condition and properly connected to the Engine PCA. 4. Run the 06507 Check Overdrive motor service diagnostic and check if the Overdrive motor status is OK. 5. Replace the Overdrive motor, if needed
-
0065-0010-0060
+During boot-up, the direction test for Overdrive motor has failed.
Solution :
1. Make sure that the integrated stacker is clear. Remove any visible obstacles (screws, plastic parts, etc.) restricting the movement in the media path. 2. Check that the Overdrive motor and connectors are properly connected, not broken, not dirty and undamaged (see Overdrive on page 584). 3. Check that the Power right bundle cable is in good condition and properly connected to the Engine PCA. 4. Run the 06507 Check Overdrive motor service diagnostic and check if the Overdrive motor status is OK. 5. Replace the Overdrive motor, if needed
-
0065-0010-0061
+There is an electrical fault in Overdrive motor.
Solution :
1. Check that the Overdrive motor and connectors are properly connected, not broken, not dirty and undamaged (see Overdrive on page 584). 2. Run the 06507 Check Overdrive motor service diagnostic and check if the Overdrive motor status is OK. 3. Replace the Overdrive motor, if needed (see Overdrive on page 584). 4. If the problem persists, replace the Engine PCA.
-
0065-0010-0062
+The Overdrive motor driver located in the Engine PCA has detected an over-temperature and it stops. NOTE: A motor driver can control more than one motor, so any of these motors can report this error if they operate at the same time.
Solution :
1. Check that the Overdrive motor and connectors are properly connected, not broken, not dirty and undamaged (see Overdrive on page 584). 2. Run the 06507 Check Overdrive motor service diagnostic and check if the Overdrive motor status is OK. 3. Replace the Overdrive motor, if needed (see Overdrive on page 584). 4. If the problem persists, replace the Engine PCA.
-
0065-0010-0063
+Motor driver not working as expected while Overdrive motor is working.
Solution :
1. Check that the Overdrive motor and connectors are properly connected, not broken, not dirty and undamaged (see Overdrive on page 584). 2. Run the 06507 Check Overdrive motor service diagnostic and check if the Overdrive motor status is OK. 3. Replace the Overdrive motor, if needed (see Overdrive on page 584). 4. If the problem persists, replace the Engine PCA.
-
0066-0001-0059
+The Cutter motor suddenly stops or fails while it is working.
Solution :
1. Make sure that the media path is clear. Remove any visible obstacles (screws, plastic parts, etc.) restricting the movement in the cutter. 2. Check that the Cutter motor is not broken, not dirty and undamaged (see Cutter motor with support (2YB64-67009) on page 499). 3. Check that Power left bundle cable is in good condition and properly connected to Cutter motor and the Engine PCA. 4. Run the 06601 Check Electronics service diagnostic and check if the Cutter motor status is OK. 5. Replace the Cutter motor, if needed Error Code Parts Catalog Service Mode, Troubleshooting Downloads Files Compatibility Used abbreviations Eng Discounts Payments Privacy, Terms, Refunds Total in database Brands: 24 Models: 9178 HP: 750 PrintCopy .info service 2001 - 2026 Next page Next page
-
0066-0001-0060
+During boot-up, the direction test for Cutter motor has failed.
Solution :
1. Make sure that the media path is clear. Remove any visible obstacles (screws, plastic parts, etc.) restricting the movement in the cutter. 2. Check that the Cutter Motor is not broken, not dirty and undamaged (see Cutter motor with support (2YB64-67009) on page 499). 3. Check that Power left bundle cable is in good condition and properly connected to Cutter motor and the Engine PCA. 4. Run the 06601 Check Electronics service diagnostic and check if the Cutter motor status is OK. 5. Replace the Cutter motor, if needed
-
0066-0001-0061
+There is an electrical fault in Cutter motor.
Solution :
1. Check that the Cutter Motor is not broken, not dirty and undamaged (see Cutter motor with support (2YB64-67009) on page 499). 2. Run the 06601 Check Electronics service diagnostic and check if the Cutter motor status is OK. 3. Replace the Cutter motor, if needed (see Cutter motor with support (2YB64-67009) on page 499). 4. If the problem persists, replace the Engine PCA.
-
0066-0001-0062
+The Cutter motor driver located in the Engine PCA has detected an over-temperature and it stops. NOTE: A motor driver can control more than one motor, so any of these motors can report this error if they operate at the same time.
Solution :
1. Check that the Cutter Motor is not broken, not dirty and undamaged (see Cutter motor with support (2YB64-67009) on page 499). 2. Run the 06601 Check Electronics service diagnostic and check if the Cutter motor status is OK. 3. Replace the Cutter motor, if needed (see Cutter motor with support (2YB64-67009) on page 499). 4. If the problem persists, replace the Engine PCA.
-
0066-0001-0063
+Motor driver not working as expected while Cutter motor is working.
Solution :
1. Check that the Cutter motor is not broken, not dirty and undamaged (see Cutter motor with support (2YB64-67009) on page 499). 2. Run the 06601 Check Electronics service diagnostic and check if the Cutter motor status is OK. 3. Replace the Cutter motor, if needed (see Cutter motor with support (2YB64-67009) on page 499). 4. If the problem persists, replace the Engine PCA.
-
0066-0003-0009
+The printer has detected that the cable from Cutter is not properly connected to Engine PCA.
Solution :
1. Check that the Cutter cable to the Engine PCA is unbroken, undamaged and properly connected. 2. Run the 06601 Check Electronics service diagnostic and check if the Cutter presence status is OK. 3. Replace the Cutter motor, if needed (see Cutter motor with support (2YB64-67009) on page 499). 4. If the problem persists, replace the Engine PCA.
-
0075-0001-0001
+The Full sensor has an electrical or mechanical issue that does not assure its functionality.
Solution :
1. Check that the Full sensor and connector are properly connected, not broken, not dirty and undamaged. 2. Make sure that the Integrated Stacker path is clear. Remove any visible obstacles (screws, plastic parts, etc.) 3. Check that Signal right bundle cable is in good condition and properly connected to Engine PCA. 4. Run the 07504 Check Sensors service diagnostic and check if the Full sensor status is OK. 5. Replace the Full sensor, if needed. Error Code Parts Catalog Service Mode, Troubleshooting Downloads Files Compatibility Used abbreviations Eng Discounts Payments Privacy, Terms, Refunds Total in database Brands: 24 Models: 9178 HP: 750 PrintCopy .info service 2001 - 2026 Send message to us
-
0075-0001-0002
+The printer has not been able to detect the Full sensor presence.
Solution :
1. Check that the Full sensor and connector are properly connected, not broken, not dirty and undamaged. 2. Check that Signal right bundle cable is in good condition and properly connected to Engine PCA. 3. Run the 07504 Check Sensors service diagnostic and check if the Full sensor status is OK. 4. Replace the Full sensor, if needed.
-
0075-0002-0001
+The Jam sensor has an electrical or mechanical issue that does not assure its functionality.
Solution :
1. Check that the Jam sensor and connector are properly connected, not broken, not dirty and undamaged. 2. Make sure that the Integrated Stacker path is clear. Remove any visible obstacles (screws, plastic parts, etc.) 3. Run the 07504 Check Sensors service diagnostic and check if the Jam sensor status is OK. 4. Replace the Jam sensor, if needed.
-
0075-0002-0002
+The printer has not been able to detect the Jam sensor presence.
Solution :
1. Check that the Jam sensor and connector are properly connected, not broken, not dirty and undamaged. 2. Check that the Signal right bundle cable is in good condition and properly connected to Engine PCA 3. Run the 07504 Check Sensors service diagnostic and check if the Jam sensor status is OK. 4. Replace the Jam sensor, if needed.
-
0075-0003-0001
+The Output valve EOT sensor has an electrical or mechanical issue that does not assure its functionality.
Solution :
1. Check that the Output valve EOT sensor and connector are properly connected, not broken, not dirty and undamaged. 2. Make sure that the Output path is clear. Remove any visible obstacles (screws, plastic parts, etc.) 3. Check that the Signal left bundle cable is in good condition and properly connected to Engine PCA 4. Run the 07501 Check Electronics service diagnostic and check if the Output valve EOT sensor status is OK. 5. Replace the Output valve EOT sensor, if needed.
-
0075-0003-0002
+The printer has not been able to detect the Output valve EOT sensor presence.
Solution :
1. Check that the Output valve EOT sensor and connector are properly connected, not broken, not dirty and undamaged. 2. Check that the Signal left bundle cable is in good condition and properly connected to Engine PCA. 3. Run the 07501 Check Electronics service diagnostic and check if the Output valve EOT sensor status is OK. 4. Replace the Output valve EOT sensor, if needed.
-
0075-0004-0059
+The Output valve motor suddenly stops or fails while it is working.
Solution :
1. Make sure that the Integrated stacker path as well as the Output valve motor gears are clear. Remove any visible obstacles (screws, plastic parts, etc.) restricting the movement in the Output valve. 2. Check that the Output valve motor is not broken, not dirty and undamaged. 3. Check that Power right bundle cable is in good condition and properly connected to the Output valve motor and the Engine PCA. 4. Run the 07502 Check Output Valve motor service diagnostic and check if the Output valve motor status is OK. 5. Replace the Output valve motor, if needed. Error Code Parts Catalog Service Mode, Troubleshooting Downloads Files Compatibility Used abbreviations Eng Discounts Payments Privacy, Terms, Refunds Total in database Brands: 24 Models: 9178 HP: 750 PrintCopy .info service 2001 - 2026
-
0075-0004-0061
+There is an electrical fault in the Output valve motor.
Solution :
1. Check that the Output valve motor is not broken, not dirty and undamaged. 2. Run the 07502 Check Output Valve motor service diagnostic and check if the Output valve motor status is OK. 3. Replace the Output valve motor, if needed. 4. If the problem persists, replace the Engine PCA.
-
0075-0004-0062
+The Output valve motor driver located in the Engine PCA has detected an over-temperature and it stops. NOTE: A motor driver can control more than one motor, so any of these motors can report this error if they operate at the same time.
Solution :
1. Check that the Output valve motor is not broken, not dirty and undamaged. 2. Run the 07502 Check Output Valve motor service diagnostic and check if the Output valve motor status is OK. 3. Replace the Output valve motor, if needed. 4. If the problem persists, replace the Engine PCA.
-
0075-0004-0063
+Motor driver not working as expected while Output valve motor is working.
Solution :
1. Check that the Output valve motor is not broken, not dirty and undamaged. 2. Run the 07502 Check Output Valve motor service diagnostic and check if the Output valve motor status is OK. 3. Replace the Output valve motor, if needed. 4. If the problem persists, replace the Engine PCA.
-
0075-0004-0080
+The Output Valve motor suddenly stops or fails while it is moving to low position.
Solution :
1. Make sure that the Integrated stacker path as well as Output valve motor gears are clear. Remove any visible obstacles (screws, plastic parts, etc.) restricting the movement in the Output valve. 2. Check that the Output valve Motor is not broken, not dirty and undamaged. 3. Check that the Power right bundle cable is in good condition and properly connected to Output valve motor and the Engine PCA. 4. Run the 07502 Check Output Valve motor service diagnostic and check if the Output valve motor status is OK. 5. Replace the Output valve motor, if needed.
-
0075-0004-0081
+The Output Valve motor suddenly stops or fails while it is moving to high position.
Solution :
1. Make sure that the Integrated stacker path as well as Output valve motor gears are clear. Remove any visible obstacles (screws, plastic parts, etc.) restricting the movement in the Output valve. 2. Check that the Output valve Motor is not broken, not dirty and undamaged. 3. Check that the Power right bundle cable is in good condition and properly connected to Output valve motor and the Engine PCA. 4. Run the 07502 Check Output Valve motor service diagnostic and check if the Output valve motor status is OK. 5. Replace the Output valve motor, if needed.
-
0075-0005-0059
+The Ramps motor suddenly stops or fails while it is working.
Solution :
1. Make sure that the Ramps path as well as the Ramps motor gears are clear. Remove any visible obstacles (screws, plastic parts, etc.) restricting the movement related to the Ramps motor. 2. Check that the Ramps motor, encoder and connector are not broken, not dirty and undamaged. 3. Check that Power left bundle cable is in good condition and properly connected to the Output valve motor and the Engine PCA. 4. Run the 07503 Check Ramps motor service diagnostic and check if the Ramps motor status is OK. 5. Replace the Ramps motor, if needed Error Code Parts Catalog Service Mode, Troubleshooting Downloads Files Compatibility Used abbreviations Eng Discounts Payments Privacy, Terms, Refunds Total in database Brands: 24 Models: 9178 HP: 750 PrintCopy .info service 2001 - 2026
-
0075-0005-0061
+There is an electrical fault in the Ramps motor.
Solution :
1. Check that the Ramps motor, encoder and connector are not broken, not dirty and undamaged. 2. Run the 07503 Check Ramps motor service diagnostic and check if the Ramps motor status is OK. 3. Replace the Ramps motor, if needed (see Ramps Motor on page 601). 4. If the problem persists, replace the Engine PCA.
-
0075-0005-0062
+The Ramps motor driver located in the Engine PCA has detected an over-temperature and it stops. NOTE :A motor driver can control more than one motor, so any of these motors can report this error if they operate at the same time.
Solution :
1. Check that the Ramps motor, encoder and connector are not broken, not dirty and undamaged. 2. Run the 07503 Check Ramps motor service diagnostic and check if the Ramps motor status is OK. 3. Replace the Ramps motor, if needed (see Ramps Motor on page 601). 4. If the problem persists, replace the Engine PCA.
-
0075-0005-0063
+Motor driver not working as expected while Ramps motor is working.
Solution :
1. Check that the Ramps motor, encoder and connector are not broken, not dirty and undamaged. 2. Run the 07503 Check Ramps motor service diagnostic and check if the Ramps motor status is OK. 3. Replace the Ramps motor, if needed (see Ramps Motor on page 601). 4. If the problem persists, replace the Engine PCA.
-
0080-0001-0002
+Front Panel application service failure
Solution :
1. Check that the printer has the latest firmware 2. Upgrade the firmware to the latest version
-
0080-0005-0002
+Front Panel Presence check failure, initialization error. The printer has not been able to detect the Front Panel presence.
Solution :
1. Check that the Front Panel cable to the Dashboard PCA is unbroken, undamaged and properly connected. 2. Replace the Front Panel, if needed. 3. If the problem persists, replace the Dashboard PCA.
-
0080-0005-0004
+Front Panel cannot communicate correctly. If the issue is persistent it indicates a malfunction in Front Panel.
Solution :
1. Check that the Front Panel cable to the Dashboard PCA is unbroken, undamaged and properly connected. 2. Replace the Front Panel, if needed. 3. If the problem persists, replace the Dashboard PCA. Error Code Parts Catalog Service Mode, Troubleshooting Downloads Files Compatibility Used abbreviations Eng Discounts Payments Privacy, Terms, Refunds Total in database Brands: 24 Models: 9178 HP: 750 PrintCopy .info service 2001 - 2026 Advertisement Advertisement
-
0080-0012-0002
+The printer has not been able to detect the Dashboard PCA USB port.
Solution :
1. Check that the Dashboard PCA cable to Formatter PCA is unbroken, undamaged and properly connected. 2. Replace the Dashboard PCA, if needed. 3. If the problem persists, replace the Formatter.
-
0080-0019-0009
+The printer has detected that the cable from Dashboard PCA is not properly connected to Formatter PCA.
Solution :
1. Check that the Dashboard cable to the Formatter PCA is unbroken, undamaged and properly connected. 2. Run the "08001 Check electronics" Service diagnostic and check if the Dashboard PCA presence status is OK. 3. Replace the Dashboard PCA, if needed. 4. If the problem persists, replace the Formatter PCA.
-
0086-0001-0001
+The trailing cable is not working properly.
Solution :
1. Check that the Trailing cable from the Engine PCA to the Carriage PCA is unbroken, undamaged and properly connected. 2. Run the 08601 Checks Electronics service diagnostic and check if the Trailing cable presence status is OK. Check also the diagnostic LED of the Carriage PCA. 3. Replace the Trailing cable, if needed. 4. Replace the Carriage PCA. 5. Replace the Engine PCA.
-
0086-0001-0004
+Trailing cable data lines cannot communicate correctly. If the issue is persistent, it indicates a malfunction in the Trailing cable.
Solution :
1. Check that the Trailing cable from the Engine PCA to the Carriage PCA is unbroken, undamaged and properly connected. 2. Run the 08601 Checks Electronics service diagnostic and check if the Trailing cable presence status is OK. Check also the diagnostic LED of the Carriage PCA. 3. Replace the Trailing cable, if needed. 4. Replace the Carriage PCA. 5. Replace the Engine PCA.
-
0086-0001-0009
+The trailing cable cannot be detected.
Solution :
1. Check that the Trailing cable from the Engine PCA to the Carriage PCA is unbroken, undamaged and properly connected. 2. Run the 08601 Checks Electronics service diagnostic and check if the Trailing cable presence status is OK. Check also the diagnostic LED of the Carriage PCA. 3. Replace the Trailing cable, if needed. 4. Replace the Carriage PCA. 5. Replace the Engine PCA.
-
0086-0002-0001
+The printer has not been able to detect the Carriage PCA presence.
Solution :
1. Check that the Trailing cable from Engine PCA to the Carriage PCA is unbroken, undamaged and properly connected. 2. Run the 08601 Checks Electronics service diagnostic and check if the Carriage PCA communications status is OK. 3. Replace the Carriage PCA. 4. Replace the Engine PCA. Error Code Parts Catalog Service Mode, Troubleshooting Downloads Files Compatibility Used abbreviations Eng Discounts Payments Privacy, Terms, Refunds Total in database Brands: 24 Models: 9178 HP: 750 PrintCopy .info service 2001 - 2026
-
0086-0002-0003
+The firmware has detected an unsupported Carriage PCA version.
Solution :
1. Make sure that the printer has the latest firmware version. 2. Upgrade the firmware firmware firmware firmware version. See Appendix A: Updating firmware in boot mode on page 292. 3. Run the 08601 Checks Electronics service diagnostic and check if the Carriage PCA version is the proper one. 4. Replace the Carriage PCA, if needed.
-
0086-0002-0004
+The Carriage PCA cannot communicate with the Engine PCA. If the issue is persistent, it indicates a malfunction in Carriage PCA.
Solution :
1. Check that the Trailing cable from the Engine PCA to the Carriage PCA is unbroken, undamaged and properly connected. 2. Run the 08601 Checks Electronics service diagnostic and check if the Carriage PCA communications status is OK. 3. Replace the Carriage PCA. 4. Replace the Trailing cable, if needed. 5. Replace the Engine PCA.
-
0086-0002-0010
+The 5 V signal generated in the Carriage PCA is not properly detected by the printer.
Solution :
1. Clean the septum and electrical connections between the carriage PCA and the printhead. Re-insert the printhead for a second attempt to start up. 2. Check that the firmware firmware firmware firmware is the latest one, and check also if the printhead or carriage PCA are well placed in the Carriage structure. 3. Check the orange 5V diagnostic LED (DS2) of the Carriage PCA (See Board name: Carriage PCA on page 50). 4. If the orange 5V diagnostic LED (DS2) is on, run the 08601 Checks Electronics service diagnostic and check if the 5V status is OK. 5. If the 5V check status is OK, try using a new printhead. 6. If the 5V check status failure is confirmed, confirmed, replace the Carriage PCA. 7. If the problem persists, replace the Trailing cable.
-
0086-0003-0038
+Only in Auto-Diagnostic test. Differen reading in encoder carriage between automatic and manual carriage movement.
Solution :
1. Check that the Linear strip encoder is not dirty, scratched or in bad condition (see Encoder Strip (CR357-67022) on page 517). 2. Check that the Encoder strip integrated in Carriage PCA is not broken, not dirty and undamaged (see Carriage PCA on page 466). 3. Check that the Power left bundle cable is in good condition and properly connected to the Media motor and the Engine PCA. 4. Run the 08602 Check Mechatronics service diagnostic and check if the Encoder strip status is OK. 5. Replace the Linear encoder strip , if needed. 6. If the problem persists, replace the Carriage PCA.
-
0086-0003-0082
+After several prints, the printer has found that the number of counts provided by the Encoder strip is less than expected, so the Encoder strip could be dirty.
Solution :
1. Check that the Linear encoder strip is not dirty, scratched or in bad condition (See Encoder Strip (CR357-67022) on page 517). 2. Check that the Encoder strip integrated in the Carriage PCA is not broken, undamaged and in good condition (See Carriage PCA on page 466). 3. Run the 08602 Checks Mechatronics and check if the Encoder strip status is OK. 4. Replace the Linear encoder strip, if needed. 5. If the problem persists, replace the Carriage PCA.
-
0086-0004-0021
+The temperature of the pen is beyond maximum margin. The nozzle area is overheating. This can be due to air present in the nozzle area of the printhead.
Solution :
1. Check which colors are still empty (if any), run the printer diagnostics, and check for 0086-0004-0nXX errors in the service plot to validate Primer & ISS. 2. Replace printhead 3. Replace primer. 4. Replace ISS. Error Code Parts Catalog Service Mode, Troubleshooting Downloads Files Compatibility Used abbreviations Eng Discounts Payments Privacy, Terms, Refunds Total in database Brands: 24 Models: 9178 HP: 750 PrintCopy .info service 2001 - 2026 Advertisement Advertisement
-
0086-0004-0022
+The temperature of the printhead is under minimum margins.
Solution :
1. Reseat printhead. 2. Replace printhead 3. Reseat Trailing cable. 4. Replace Carriage PCA. 5. Replace Carriage without PCA/Line sensor. 6. Replace Engine PCA.
-
0086-0004-0080
+There is no printhead detected.
Solution :
1. Reseat printhead. 2. Replace printhead 3. Reseat Trailing cable. 4. Replace Carriage PCA. 5. Replace Carriage without PCA/Line sensor. 6. Replace Engine PCA.
-
0086-0004-0081
+Error while reading or writing printhead bits.
Solution :
1. Reseat printhead. 2. Replace printhead 3. Reseat Trailing cable. 4. Replace Carriage PCA. 5. Replace Carriage without PCA/Line sensor. 6. Replace Engine PCA.
-
0086-0004-0082
+The CSDATA communication failed or is erroneous.
Solution :
1. Reseat printhead. 2. Replace printhead 3. Reseat Trailing cable. 4. Replace Carriage PCA. 5. Replace Carriage without PCA/Line sensor. 6. Replace Engine PCA.
-
0086-0004-0083
+Failed pen ID programming or pen continuity tests.
Solution :
1. Reseat printhead. 2. Replace printhead 3. Reseat Trailing cable. 4. Replace Carriage PCA. 5. Replace Carriage without PCA/Line sensor. 6. Replace Engine PCA.
-
0086-0004-0084
+Under-voltage, over-voltage or ink shortage detected in Vcc (5V).
Solution :
1. Replace printhead 2. Reseat Trailing cable. 3. Replace Carriage PCA. 4. Replace Carriage without PCA/Line sensor. 5. Replace Engine PCA. Error Code Parts Catalog Service Mode, Troubleshooting Downloads Files Compatibility Used abbreviations Eng Discounts Payments Privacy, Terms, Refunds Total in database Brands: 24 Models: 9178 HP: 750 PrintCopy .info service 2001 - 2026
-
0086-0004-0085
+Under-voltage, over-voltage, leakage or ink shortage detected in Vpp or VppLogic.
Solution :
1. Replace printhead 2. Reseat Trailing cable. 3. Replace Carriage PCA. 4. Replace Carriage without PCA/Line sensor. 5. Replace Engine PCA.
-
0086-0004-0088
+Parity error on printhead bits.
Solution :
1. Reseat printhead 2. Replace printhead 3. Reseat Trailing cable. 4. Replace Carriage PCA. 5. Replace Carriage without PCA/Line sensor. 6. Replace Engine PCA.
-
0086-0004-0089
+The model inserted is not the model required by the printer or the color or the printhead version is not in the required slot.
Solution :
Replace printhead.
-
0086-0004-0090
+The printhead has many nozzles missing.
Solution :
Replace printhead if image quality is not acceptable.
-
0086-0004-0091
+The Printhead warranty has expired.
Solution :
Replace printhead if image quality is not acceptable.
-
0086-0004-0092
+The Printhead replacement was incomplete.
Solution :
Reseat printhead. Error Code Parts Catalog Service Mode, Troubleshooting Downloads Files Compatibility Used abbreviations Eng Discounts Payments Privacy, Terms, Refunds Total in database Brands: 24 Models: 9178 HP: 750 PrintCopy .info service 2001 - 2026 Next page Next page
-
0086-0004-0093
+The energy calibration has failed.
Solution :
1. Reseat printhead. 2. Check which colors are still empty (if any), run printer diagnostics, and check for 0086-0004-0nXX errors in the service plot to validate Primer & ISS. 3. Replace printhead 4. Replace Primer. 5. Replace ISS.
-
0086-0004-0195
+Ink pressure check failed for the photo black ink. Ink pressure is not within the expected range.
Solution :
1. Check that the photo black cartridge is properly installed and not empty. 2. Run the ink pressure diagnostic. 3. Check the ink delivery system. 4. Replace the cartridge, if needed.
-
0086-0004-0196
+Second ink pressure check failure for the photo black ink.
Solution :
1. Check the installation and level of the photo black cartridge. 2. Check the ink delivery system (tubes, printhead). 3. Replace the cartridge or contact support.
-
0086-0004-0197
+Temperature check failed during the spit test for the photo black ink.
Solution :
1. Let the printer reach room temperature. 2. Run the test again. 3. Replace the printhead if the problem persists.
-
0086-0004-0295
+Ink pressure check failed for the gray ink. Ink pressure is not within the expected range.
Solution :
1. Check that the gray cartridge is properly installed and not empty. 2. Run the ink pressure diagnostic. 3. Check the ink delivery system. 4. Replace the cartridge, if needed.
-
0086-0004-0296
+Second ink pressure check failure for the gray ink.
Solution :
1. Check the installation and level of the gray cartridge. 2. Check the ink delivery system. 3. Replace the cartridge or contact support.
-
0086-0004-0297
+Temperature check failed during the spit test for the gray ink.
Solution :
1. Let the printer reach room temperature. 2. Run the test again. 3. Replace the printhead, if needed.
-
0086-0004-0395
+Ink pressure check failed for the matte black ink. Ink pressure is not within the expected range.
Solution :
1. Check that the matte black cartridge is properly installed and not empty. 2. Run the ink pressure diagnostic. 3. Check the ink delivery system. 4. Replace the cartridge, if needed.
-
0086-0004-0396
+Second ink pressure check failure for the matte black ink.
Solution :
1. Check the installation and level of the matte black cartridge. 2. Check the ink delivery system. 3. Replace the cartridge or contact support.
-
0086-0004-0397
+Temperature check failed during the spit test for the matte black ink.
Solution :
1. Let the printer reach room temperature. 2. Run the test again. 3. Replace the printhead, if needed.
-
0086-0004-0495
+Ink pressure check failed for the cyan ink. Ink pressure is not within the expected range.
Solution :
1. Check that the cyan cartridge is properly installed and not empty. 2. Run the ink pressure diagnostic. 3. Replace the cartridge, if needed.
-
0086-0004-0496
+Second ink pressure check failure for the cyan ink.
Solution :
1. Check the installation and level of the cyan cartridge. 2. Check the ink delivery system. 3. Replace the cartridge or contact support.
-
0086-0004-0497
+Temperature check failed during the spit test for the cyan ink.
Solution :
1. Let the printer reach room temperature. 2. Run the test again. 3. Replace the printhead, if needed.
-
0086-0004-0595
+Ink pressure check failed for the magenta ink. Ink pressure is not within the expected range.
Solution :
1. Check that the magenta cartridge is properly installed and not empty. 2. Run the ink pressure diagnostic. 3. Replace the cartridge, if needed.
-
0086-0004-0596
+Second ink pressure check failure for the magenta ink.
Solution :
1. Check the installation and level of the magenta cartridge. 2. Check the ink delivery system. 3. Replace the cartridge or contact support.
-
0086-0004-0597
+Temperature check failed during the spit test for the magenta ink.
Solution :
1. Let the printer reach room temperature. 2. Run the test again. 3. Replace the printhead, if needed.
-
0086-0004-0695
+Ink pressure check failed for the yellow ink. Ink pressure is not within the expected range.
Solution :
1. Check that the yellow cartridge is properly installed and not empty. 2. Run the ink pressure diagnostic. 3. Replace the cartridge, if needed.
-
0086-0004-0696
+Second ink pressure check failure for the yellow ink.
Solution :
1. Check the installation and level of the yellow cartridge. 2. Check the ink delivery system. 3. Replace the cartridge or contact support.
-
0086-0004-0697
+Temperature check failed during the spit test for the yellow ink.
Solution :
1. Let the printer reach room temperature. 2. Run the test again. 3. Replace the printhead, if needed.
-
0086-0005-0009
+The line sensor cannot be detected.
Solution :
1. Check that the Line sensor cable to the Carriage PCA is unbroken, undamaged and properly connected. 2. Run the 08601 Checks Electronics service diagnostic and check if the Line sensor status is OK. 3. Replace the Line sensor, if needed. 4. If the problem persists, replace the Carriage PCA.
-
0086-0005-0046
+The line sensor cannot be calibrated.
Solution :
1. Check that the Line sensor cable to the Carriage PCA is unbroken, undamaged and properly connected. 2. Run the 08601 Checks Electronics service diagnostic and check if the Line sensor status is OK. 3. Run the Drop detector calibration Service utility. 4. Replace the Line sensor, if needed. 5. If the problem persists, replace the Carriage PCA. Error Code Parts Catalog Service Mode, Troubleshooting Downloads Files Compatibility Used abbreviations Eng Discounts Payments Privacy, Terms, Refunds Total in database Brands: 24 Models: 9178 HP: 750 PrintCopy .info service 2001 - 2026 Account Login
-
0086-0005-0065
+The line sensor has a non valid calibration values.
Solution :
1. Check that the Line sensor cable to the Carriage PCA is unbroken, undamaged and properly connected. 2. Run the 08601 Checks Electronics service diagnostic and check if the Line sensor status is OK. 3. Run the Drop detector calibration Service utility. 4. Replace the Line sensor, if needed. 5. If the problem persists, replace the Carriage PCA.
-
0090-0001-0097
+A process being babysitted died.
Solution :
Upgrade the firmware to the latest version.
-
0090-0001-0099
+A process being babysitted died.
Solution :
Upgrade the firmware to the latest version.
-
0090-0004-0080
+FSM - Transition not found.
Solution :
Upgrade the firmware to the latest version.
-
0090-0006-0084
+Connectivity IO reset.
Solution :
1. Run the 00103 Check connectivity service diagnostic and check If the connectivity board status is OK. 2. Run the 09901 Hard reset connectivity service diagnostic and resets its internal configuration 3. Upgrade the firmware to the latest version
-
0090-0006-0086
+Connectivity process lost.
Solution :
1. Run the 00103 Check connectivity service diagnostic and check If the connectivity board status is OK. 2. Run the 09901 Hard reset connectivity service diagnostic and resets its internal configuration. configuration. configuration. configuration. 3. Upgrade the firmware firmware firmware firmware to the latest version Error Code Parts Catalog Service Mode, Troubleshooting Downloads Files Compatibility Used abbreviations Eng Discounts Payments Privacy, Terms, Refunds Total in database Brands: 24 Models: 9178 HP: 750 PrintCopy .info service 2001 - 2026 Previous page Previous page
-
0090-0007-0005
+PDL I/O timeout
Solution :
Upgrade the firmware to the latest version.
-
0090-0007-0044
+No memory to start PDL
Solution :
Upgrade the firmware to the latest version.
-
0090-0007-0082
+PDF is locked for printing
Solution :
Upgrade the firmware to the latest version.
-
0090-0007-0085
+Out of disk space
Solution :
1. Run the 09904 Delete Job Manager Queue service diagnostic to have free space on hard disk. 2. Upgrade the firmware to the latest version
-
0090-0007-0087
+PS fonts missing
Solution :
Upgrade the firmware to the latest version.
-
0090-0007-0089
+PDL – Unexpected end of job
Solution :
1. Check the customer’s network to ensure that network speed is adequate and that there are no breaks in communication. 2. Upgrade the firmware to the latest version Error Code Parts Catalog Service Mode, Troubleshooting Downloads Files Compatibility Used abbreviations Eng Discounts Payments Privacy, Terms, Refunds Total in database Brands: 24 Models: 9178 HP: 750 PrintCopy .info service 2001 - 2026 Next page Next page
-
0090-0007-0094
+Out of virtual memory
Solution :
Upgrade the firmware firmware to the latest version
-
0090-0007-0096
+PDL parse error
Solution :
Upgrade the firmware firmware to the latest version
-
0090-0008-0080
+JPEG library error or Raster Configure failed or Image swath
Solution :
Upgrade the firmware firmware to the latest version
-
0090-0009-0080
+Make Directory or Open directory or Close directory or Write directory
Solution :
Upgrade the firmware firmware to the latest version
-
0090-0012-0083
+Unsupported PDL
Solution :
Upgrade the firmware firmware to the latest version
-
0090-0018-0004
+Unable to connect to front panel or Control panel connection lost
Solution :
Upgrade the firmware firmware to the latest version Error Code Parts Catalog Service Mode, Troubleshooting Downloads Files Compatibility Used abbreviations Eng Discounts Payments Privacy, Terms, Refunds Total in database Brands: 24 Models: 9178 HP: 750 PrintCopy .info service 2001 - 2026 Next page Next page
-
0090-0085-0090
+More than one Tupperware in USB root.
Solution :
Upgrade the firmware firmware to the latest version
-
0090-0085-0091
+Incorrect Tupperware in USB root.
Solution :
Upgrade the firmware firmware to the latest version
-
0090-0090-0003
+Firmware/hardware mismatch
Solution :
Upgrade the firmware firmware to the latest version
-
0090-0090-0005
+The printer has detected a timeout to perform any process related to firmware.
Solution :
1. Upgrade the firmware firmware firmware firmware to the latest version. See Appendix A: Updating firmware in boot mode on page 292. 2. Run the 00102 Check Mechatronics service diagnostic and check if the Engine PCA status is OK. 3. Replace the Engine PCA.
-
0090-0090-0050
+The printer has not been able to read/get a value, partition issue.
Solution :
1. Upgrade the firmware firmware firmware firmware to the latest version. See Appendix A: Updating firmware in boot mode on page 292. 2. Re-image HDD or replace the HDD having previously used the 00107 Reset HDD to be removed Service Diagnostic.
-
0090-0090-0078
+Firmware update needed.
Solution :
Upgrade the firmware firmware to the latest version Error Code Parts Catalog Service Mode, Troubleshooting Downloads Files Compatibility Used abbreviations Eng Discounts Payments Privacy, Terms, Refunds Total in database Brands: 24 Models: 9178 HP: 750 PrintCopy .info service 2001 - 2026 Next page Next page
-
0090-0090-0080
+Only in auto-diagnostic test. The printer has detected an issue with the auto-diagnostic test execution
Solution :
Upgrade the firmware firmware to the latest version
-
1009-0001-0001
+The printer has not been able to detect the Media Feed motor presence
Solution :
1. Check that the Media Feed motor cable to the Scanner Controller board is unbroken, undamaged and properly connected. 2. Restart the printer. Open the scanner cover. Underneath you will see red, then green, then blue flashingflashing lights. In the center of the scanner cover, between the flashing lights, you will find four small sensors labeled R, G, B, and L. Put your fingers fingers over the R, G, and B sensors simultaneously; the scanner motor should advance. 3. Run the 10901 Checks Electronics Service diagnostic and check if the Media Feed motor status is OK. 4. Replace the Media Feed motor, if needed. 5. If the problem persists, replace the Scanner Controller board.
-
1009-0002-0101
+The printer has detected a malfunction in the scanner's CIS A sensor.
Solution :
1. Check the CIS A sensor cable to the Scanner Controller Board. 2. Clean the CIS sensor. 3. Replace the CIS A sensor, if needed.
-
1009-0002-0201
+The printer has detected a malfunction in the scanner's CIS B sensor.
Solution :
1. Check the CIS B sensor cable to the Scanner Controller Board. 2. Clean the sensor. 3. Replace the CIS B sensor, if needed.
-
1009-0002-0301
+The printer has detected a malfunction in the scanner's CIS C sensor.
Solution :
1. Check the CIS C sensor cable to the Scanner Controller Board. 2. Clean the sensor. 3. Replace the CIS C sensor, if needed.
-
1009-0002-0401
+The printer has detected a malfunction in the scanner's CIS D sensor.
Solution :
1. Check the CIS D sensor cable to the Scanner Controller Board. 2. Clean the sensor. 3. Replace the CIS D sensor, if needed.
-
1009-0002-0501
+The printer has detected a malfunction in the scanner's CIS E sensor.
Solution :
1. Check the CIS E sensor cable to the Scanner Controller Board. 2. Clean the sensor. 3. Replace the CIS E sensor, if needed.
-
1009-0003-0052
+The printer has detected that the power cable from the Scanner Controller Board is not properly connected to Engine PCA.
Solution :
1. Check that the Scanner Controller board power cable to the Engine PCA is unbroken, undamaged and properly connected. 2. Run the 10901 Checks Electronics Service diagnostic and check if the scanner status is OK. 3. Replace the Scanner Controller board, if needed. 4. If the problem persists, replace the Engine PCA.
-
1009-0004-0053
+The printer has detected that the data cable from the Scanner Controller Board is not properly connected to the formatter.
Solution :
1. Check that the Scanner Controller board data (USB) cable to the Formatter PCA is unbroken, undamaged and properly connected. 2. Run the 10901 Checks Electronics Service diagnostic and check if the scanner status is OK. 3. Replace the USB cable. 4. Replace the Scanner Controller board, if needed. 5. If the problem persists, replace the Engine PCA.
-
1009-0005-0002
+The printer has not been able to detect the Scanner Controller board presence.
Solution :
1. Check that the Scanner Controller board cables to the Engine PCA are unbroken, undamaged and properly connected. 2. Run the 10901 Checks Electronics Service diagnostic and check if the scanner status is OK. 3. Replace the Scanner Controller board, if needed. 4. If the problem persists, replace the Engine PCA. Error Code Parts Catalog Service Mode, Troubleshooting Downloads Files Compatibility Used abbreviations Eng Discounts Payments Privacy, Terms, Refunds Total in database Brands: 24 Models: 9178 HP: 750 PrintCopy .info service 2001 - 2026 First page
-
1009-0006-0080
+Failed to load scanner library
Solution :
Upgrade the firmware to the latest version
-
1009-0006-0081
+Firmware version mismatch
Solution :
Upgrade the firmware to the latest version
-
1009-0006-0082
+Library version missmatch
Solution :
Upgrade the firmware to the latest version
-
1009-0006-0098
+Firmware upgrade failed
Solution :
Upgrade the firmware to the latest version
-
1009-0007-0046
+Scaner never calibrated or calibration values not found, calibration needed.
Solution :
1. Clean and calibrate the scanner. 2. Upgrade the firmware to the latest version
-
1009-0007-0083
+Firmware restart failed
Solution :
Upgrade the firmware to the latest version Error Code Parts Catalog Service Mode, Troubleshooting Downloads Files Compatibility Used abbreviations Eng Discounts Payments Privacy, Terms, Refunds Total in database Brands: 24 Models: 9178 HP: 750 PrintCopy .info service 2001 - 2026 Next page Next page
-
1009-0007-0098
+Firmware upgrade needed /failed
Solution :
Upgrade the firmware to the latest version
-
1009-0008-0001
+Scanner is in SAFE MODE
Solution :
Upgrade the firmware to the latest version Error Code Parts Catalog Service Mode, Troubleshooting Downloads Files Compatibility Used abbreviations Eng Discounts Payments Privacy, Terms, Refunds Total in database Brands: 24 Models: 9178 HP: 750 PrintCopy .info service 2001 - 2026 Previous page Previous page
Problèmes fréquents
Cliquez sur + pour voir l'explication et les solutions
-
Se bloque au démarrage
Un traceur HP DesignJet T2600 qui bloque au démarrage a généralement un problème de carte mère (Carte formatter ou Main PCA ou electronic module)
+HP DesignJet T2600 qui bloque au démarrage a la carte formatter ou la Main PCA HS.
Son remplacement est complexe car il nécessite un démontage important.Cause :
La carte formatter ou la Main PCA est HS, il va falloir la remplacer.
Intervention technicien :
Le remplacement de la carte nécessite l'intervention d'un technicien.
Prévoir 1 à 3 heures d'intervention + déplacement + le prix de la pièce. -
Alimenté mais ne démarre pas
Un traceur HP DesignJet T2600 qui ne démarre pas a généralement un problème de carte mère (Carte formatter ou Main PCA ou electronic module).
+HP DesignJet T2600 qui s'allume mais ne démarre pas a la carte formatter ou la Main PCA HS.
Son remplacement est complexe car il nécessite un démontage important.Cause :
La carte formatter ou la Main PCA est HS, il va falloir la remplacer.
Intervention technicien :
Le remplacement de la carte nécessite l'intervention d'un technicien.
Prévoir 1 à 3 heures d'intervention + déplacement + le prix de la pièce. -
L'écran reste blanc
Un traceur HP DesignJet T2600 dont l'écran reste blanc (éclairé mais sans aucune inscription) a un problème de carte mère (carte formatter ou Main PCA).
+HP DesignJet T2600 qui s'allume avec un écran blanc à la carte formatter ou la Main PCA HS.
Son remplacement est complexe car il nécessite un démontage important.Cause :
La carte formmater ou la Main PCA est HS, il faut la remplacer.
Intervention technicien :
1/ Identifier précisément la pièce à remplacer à l'aide des 3 voyant qui se trouvent à côté de la prise réseau.
2/ Faire intervenir un technicien pour remplacer la pièce défectueuse, prévoir 1 à 3 heures de main d'oeuvre + déplacement + la fourniture de la pièce. -
Le traceur HP DesignJet T2600 ne répond pas aux ordres du PC
Le traceur HP DesignJet T2600 est allumé, affiche prêt, mais ne réagit pas.
+HP DesignJet T2600 qui démarre correctement mais ne répond pas aux ordres du PC a un problème de communication.
Le problème peut avoir plusieurs origines : Adresse IP mal paramétrée, mauvais pilote d'impression, câble HS...
La recherche du "coupable" peut être compliquée.Cause :
Les causes possibles sont :
- Le câble réseau est HS ou déconnecté.
- Il y a un problème d'adresse IP : Conflit d'adresse, adresse changée, box inaccessible...
- Le pilote est corrompu ou pas compatible.Auto-dépannage :
Vérifiez la connexion physique du réseau (les câbles, la box, le switch...)
Vérifiez l'adresse IP du traceur HP DesignJet T2600 (changement d'adresse, absence de conflit...)
Vérifiez le pilote d'impression
Si tout est en ordre il se peut que la carte réseau du traceur HP DesignJet T2600 soit HS.Intervention technicien :
Pour une interventions sur site prévoir 1 à 3 heures pour faire tous les tests étape par étape et identifier l'origine du problème + déplacement + fourniture éventuelle d'une carte réseau.
-
Pas d'alimentation électrique
Un traceur HP DesignJet T2600 qui ne présente aucune trace d'alimentation électrique a probablement le bloc alimentation HS.
+HP DesignJet T2600 qui n'est plus du tout alimenté a le bloc d'alimentation HS.
Son remplacement est complexe car il nécessite un démontage important.Cause :
Le bloc d'alimentation est HS, il va falloir le remplacer.
Intervention technicien :
Le remplacement du bloc d'alimentation nécessite l'intervention d'un technicien.
Prévoir 1 à 2 heures d'intervention + déplacement + le prix de la pièce. -
Problème de qualité d'impression
Votre traceur HP DesignJet T2600 a une mauvaise qualité d'impression.
+HP DesignJet T2600 qui a un problème de qualité d'impression (couleurs non conformes, couleurs non homogènes, traits mal formés, bavures, impressions vierge ou incomplètes...) a une tête d'impression en mauvais état.
Vous pouvez essayer de lancer une procédure de nettoyage de la tête d'impression. Si la procédure ne résout pas le problème, c'est qu'il faut remplacer la tête. Vous pouvez nous la commander et essayer de la remplacer par vous même.
En cas de doute, faites nous intervenir, notre technicien en profitera pour faire une révision du traceur HP DesignJet T2600.Cause :
Il y a de fortes chances pour la tête d'impression de votre traceur HP DesignJet T2600 soient usée.
La majorité des problèmes de qualité d'impression (couleurs non conformes, couleurs non homogènes, traits mal formés, bavures, impressions vierge ou incomplètes...) sont causés par une tête d'impression usée ou HS .Auto-dépannage :
Commencez par remplacer la tête d’impression de votre traceur HP DesignJet T2600.
Contrairement aux cartouches, la tête d’impression de votre traceur HP DesignJet T2600 n'est pas pleine ou vide.
Elle s’use au four et à mesure de son utilisation et de son âge.
Selon l’intensité et l’usage du traceur HP DesignJet T2600, une tête aura une espérance de vie de plusieurs mois à plusieurs années.
Le traceur HP DesignJet T2600 mémorise l’usage de la tête d’impression. Il arrive qu’un traceur HP DesignJet T2600 propose ou exige le remplacement d'une tête trop usée ou en mauvais état.
Il arrive aussi que la tête d’impression soit usée et provoque de mauvaises impressions sans que le traceur HP DesignJet T2600 ne signale quoi que ce soit.
Si c’est le cas, n’hésitez pas à remplacer votre tête d’impression.
Attention, le remplacement de la tête d'impression nécessite d'avoir des cartouches suffisamment pleines.Intervention technicien :
Si vous ne souhaitez pas remplacer la tête d'impression par vous-même, nous pouvons intervenir pour la remplacer, prévoir 1 heure de main d'oeuvre + déplacement + fournitures de la tête neuve + fourniture éventuelle de cartouches neuves (nécessaires au remplacement de la tête d'impression).
Si le remplacement de la tête d'impression est impossible ou si le problème n'est pas résolu, c'est que le problème est plus complexe, prévoir alors une intervention de 1 heure à 3 heures + déplacement fourniture éventuelle de pièces détachées (station service, inktube, chariot...)
Nomenclature des pièces détachées
Aucune pièce trouvée — contactez-nous
- CQ533-60003 Power cord - For use with Designjet printers (Asia)
- CR357-67024 Primer assembly
- B3P06A HP 727 Designjet Printhead
- CR357-67020 Line sensor - Includes FFC cable
- CR357-67026 Drop sensor - Detects if there is ink dropping
- CR357-67031 Media sensor assembly
- CR357-67080 Stacker arm sensor
- CR359-67014 Contact image sensor (CIS) tiles kit
- CR359-67018 Paper media lid sensor
- CR357-67025 Service station with drop detector
- CR357-67093 36-inch spindle assembly - For the T920, T1500, T2500 series
- CR357-67043 Stacker overdrive transmission with motor
- CR357-67094 Stand assembly - For the T9x0, Tx500 series
- CR354-67004 36-inch metal sheet starwheel assembly
- CR357-67086 Starwheel lifter support assembly
- CH538-67074 Center support assembly
- CR357-67037 Top re-winder support A
- CR357-67038 Top tip support assembly
- CN727-69006 Calibration sheet - Includes cleaning cloth
- Q6683-67028 Tool Kit - Includes the flex cleaner, screwdriver torx T-15, dispenser oil, insert spring tool, alignment manual pinch arm, and media driver tool
- CR357-67066 Basket output tray assembly - Where paper rest after it has been printed
- 2YB64-60122 Big monitor kit
- 2YB64-67001 XL3600/TX600 PSU
- 2YB64-67009 MARS&NEPT cutter motor with support
- 2YB64-67010 MARS&NEPT cutter module with belt
- 2YB64-67011 MARS&NEPT cutter guide with pulley & bumper
- 2YB64-67015 MARS big monitor cables
- 2YB64-67021 MARS NEPT one rail PCA
- 2YB64-67047 XL 3600/TX600 PMK3
- 2YB64-67058 TX600 LW2.1 PCA SV
- 3ED43A HP 730B 130ml Photo Black Ink Cartridge
- 3ED44A HP 730B 130ml Gray Ink Cartridge
- 3ED45A HP 730B 130ml Matte Black Ink Cartridge
- 3ED49A HP 730B 300ml Photo Black Ink Cartridge
- 3ED50A HP 730B 300ml Gray Ink Cartridge
- 3ED51A HP 730B 300ml Matte Black Ink Cartridge
- 3EK10-67002 NEPT triton PCA with cover
- 3EK10-67003 NEPTUNE Appleby PCA
- 3EK10-67006 TX600 wifi lid
- 3EK10-67007 T1600 Stacker w/o Arms assembly
- 3EK10-67008 XL3600/TX600 Stacker Hand Off Assembly
- 3EK10-67013 Blue Hub with Spring SV Kit
- 3XB77-67002 TX600 Stepper Motor with Tach Sensor
- 3XB77-67003 TX600 Pressure Roller
- 3XB77-67004 TX600 Torsioner Dump
- 3XB77-67005 TX600 Glass Plate
- 3XB77-67006 TX600 Power/Reset/Awake Cable
- 3XB77-67007 TX600 CIS module 5 unit
- 3XB77-67008 TX600 500G HDD SV kit
- 3XB78-67001 NP 1R MF PS Nameplate Kit
- 6KD23-67023 XL3600/TX600 ISS SVS side
- 6KD23-67024 XL3600/TX600 ISS CP side
- 6KD23-67027 XL3600/TX600 CryptoAsic SIM SV
- 6KD23-67032 XL3600/TX600 Second OV SW Rail
- 6KD23-67035 XL3600 Latch Hook Assembly Push S
- 6KD23-67042 XL3600/TX600 Cutter Platen with adjustment tool
- 6KD23-67043 Cutter adjustment tool
- 6KD23-67044 XL3600/TX600 Cover Fixed Tray FP side
- B9E24-67041 MRY series Screws kit
- CR354-67006 Input Tray Assembly
- CR357-67005B T920/Tx500 Auto Pinch Lifter Assembly
- CR357-67010-BU T920/Tx500 Module Motor SW
- CR357-67021BM 20 Pack - T920/Tx500 Belt
- CR357-67022BM 20 Pack - T920/Tx500 Linear Encoder
- CR357-67025-MP 5pk, T920/Tx500 SVS with Drop Detector
- CR357-67073B T920/T1500/T2500 PM KIT-2
- CR357-67080B T920/Tx500 Microswitch
- CR357-67081-MP 5pk, T920/Tx500 Carriage PCA
- CR357-67089 T920/Tx500 Stacker Tray Filler
- CR357-67090 T920/Tx500 Grease Kit 3cc Syringe
- CR359-67003 T2500 Cover Scanner CP side
- CR359-67004 T2500 Cover Scanner S side
- CR359-67005 T2500 Cover Scanner Rear
- CR359-67018B T2500/T3500 Media Sensor
- L2Y21-67006 T9XX/T15XX/T25XX Rear Beam SV kit
- L2Y21-67014 Grit Roller Assembly Mry/Aeneas 36in
- L2Y21-67015 Protective Cover Left SV
- L2Y23-67002 HP DJ T930/T1530/T2530 Full Bleed
- Y3T75-67001 NEPT MFP right bracket with power button & speaker
- Y3T75-67002 NEPT MFP Tasmania PCA
- Y3T75-67003 T2600 Front panel arms
- Y3T75-67004 T2600 Front panel tube
- Y3T75-67005 T2600 Front panel bezel
- Y3T75-67006 TX600 wifi bezel housing
- Y3T75-67007 TX600 PMK1
- Y3T75-67010 TX600 Ink Door CP
- Y3T75-67011 TX600 Main Cover CP side
- Y3T75-67012 TX600 Main Cover SVS side
- Y3T75-67013 TX600 Serial Label
- Y3T75-67014 TX600 Top Cover Scanner
- Y3T75-67015 TX600 Top Roll Cover
- Y3T75-67016 TX600 Rear Cover SV kit
- Y3T75-67017 TX600 Cables Kit
- Y3T75-67018 TX600 Ink Door SVS side
Pilote d'impression
Télécharger →Utilitaire PDF
Télécharger →Firmware
Télécharger →Fiche technique
Télécharger →Besoin d'assistance ? Nous pouvons prendre la main à distance.
Télécharger TeamViewerNous contacter
Votre HP DesignJet T2600 est en panne ?
Appelez directement notre expert ou remplissez le formulaire de contact. Pas de serveur vocal, pas d'attente.
Nous vous répondons en général en moins de 2 heures.
- 04 78 01 03 24
- info@traceur-lyon.fr
- 23 bis rue Victor et Roger Thomas
69008 Lyon
Devis sous 2h
Demandez votre devis HP DesignJet T2600
Décrivez votre panne (code erreur affiché, symptôme constaté). Nous vous rappelons sous 2 h avec un devis personnalisé.
- Diagnostic gratuit par téléphone
- Réponse sous 2 heures
- Intervention sur site en 48 h en Rhône-Alpes
- Pièces du T2600 en stock à Lyon
- Dépannages garantis 1 an sur site